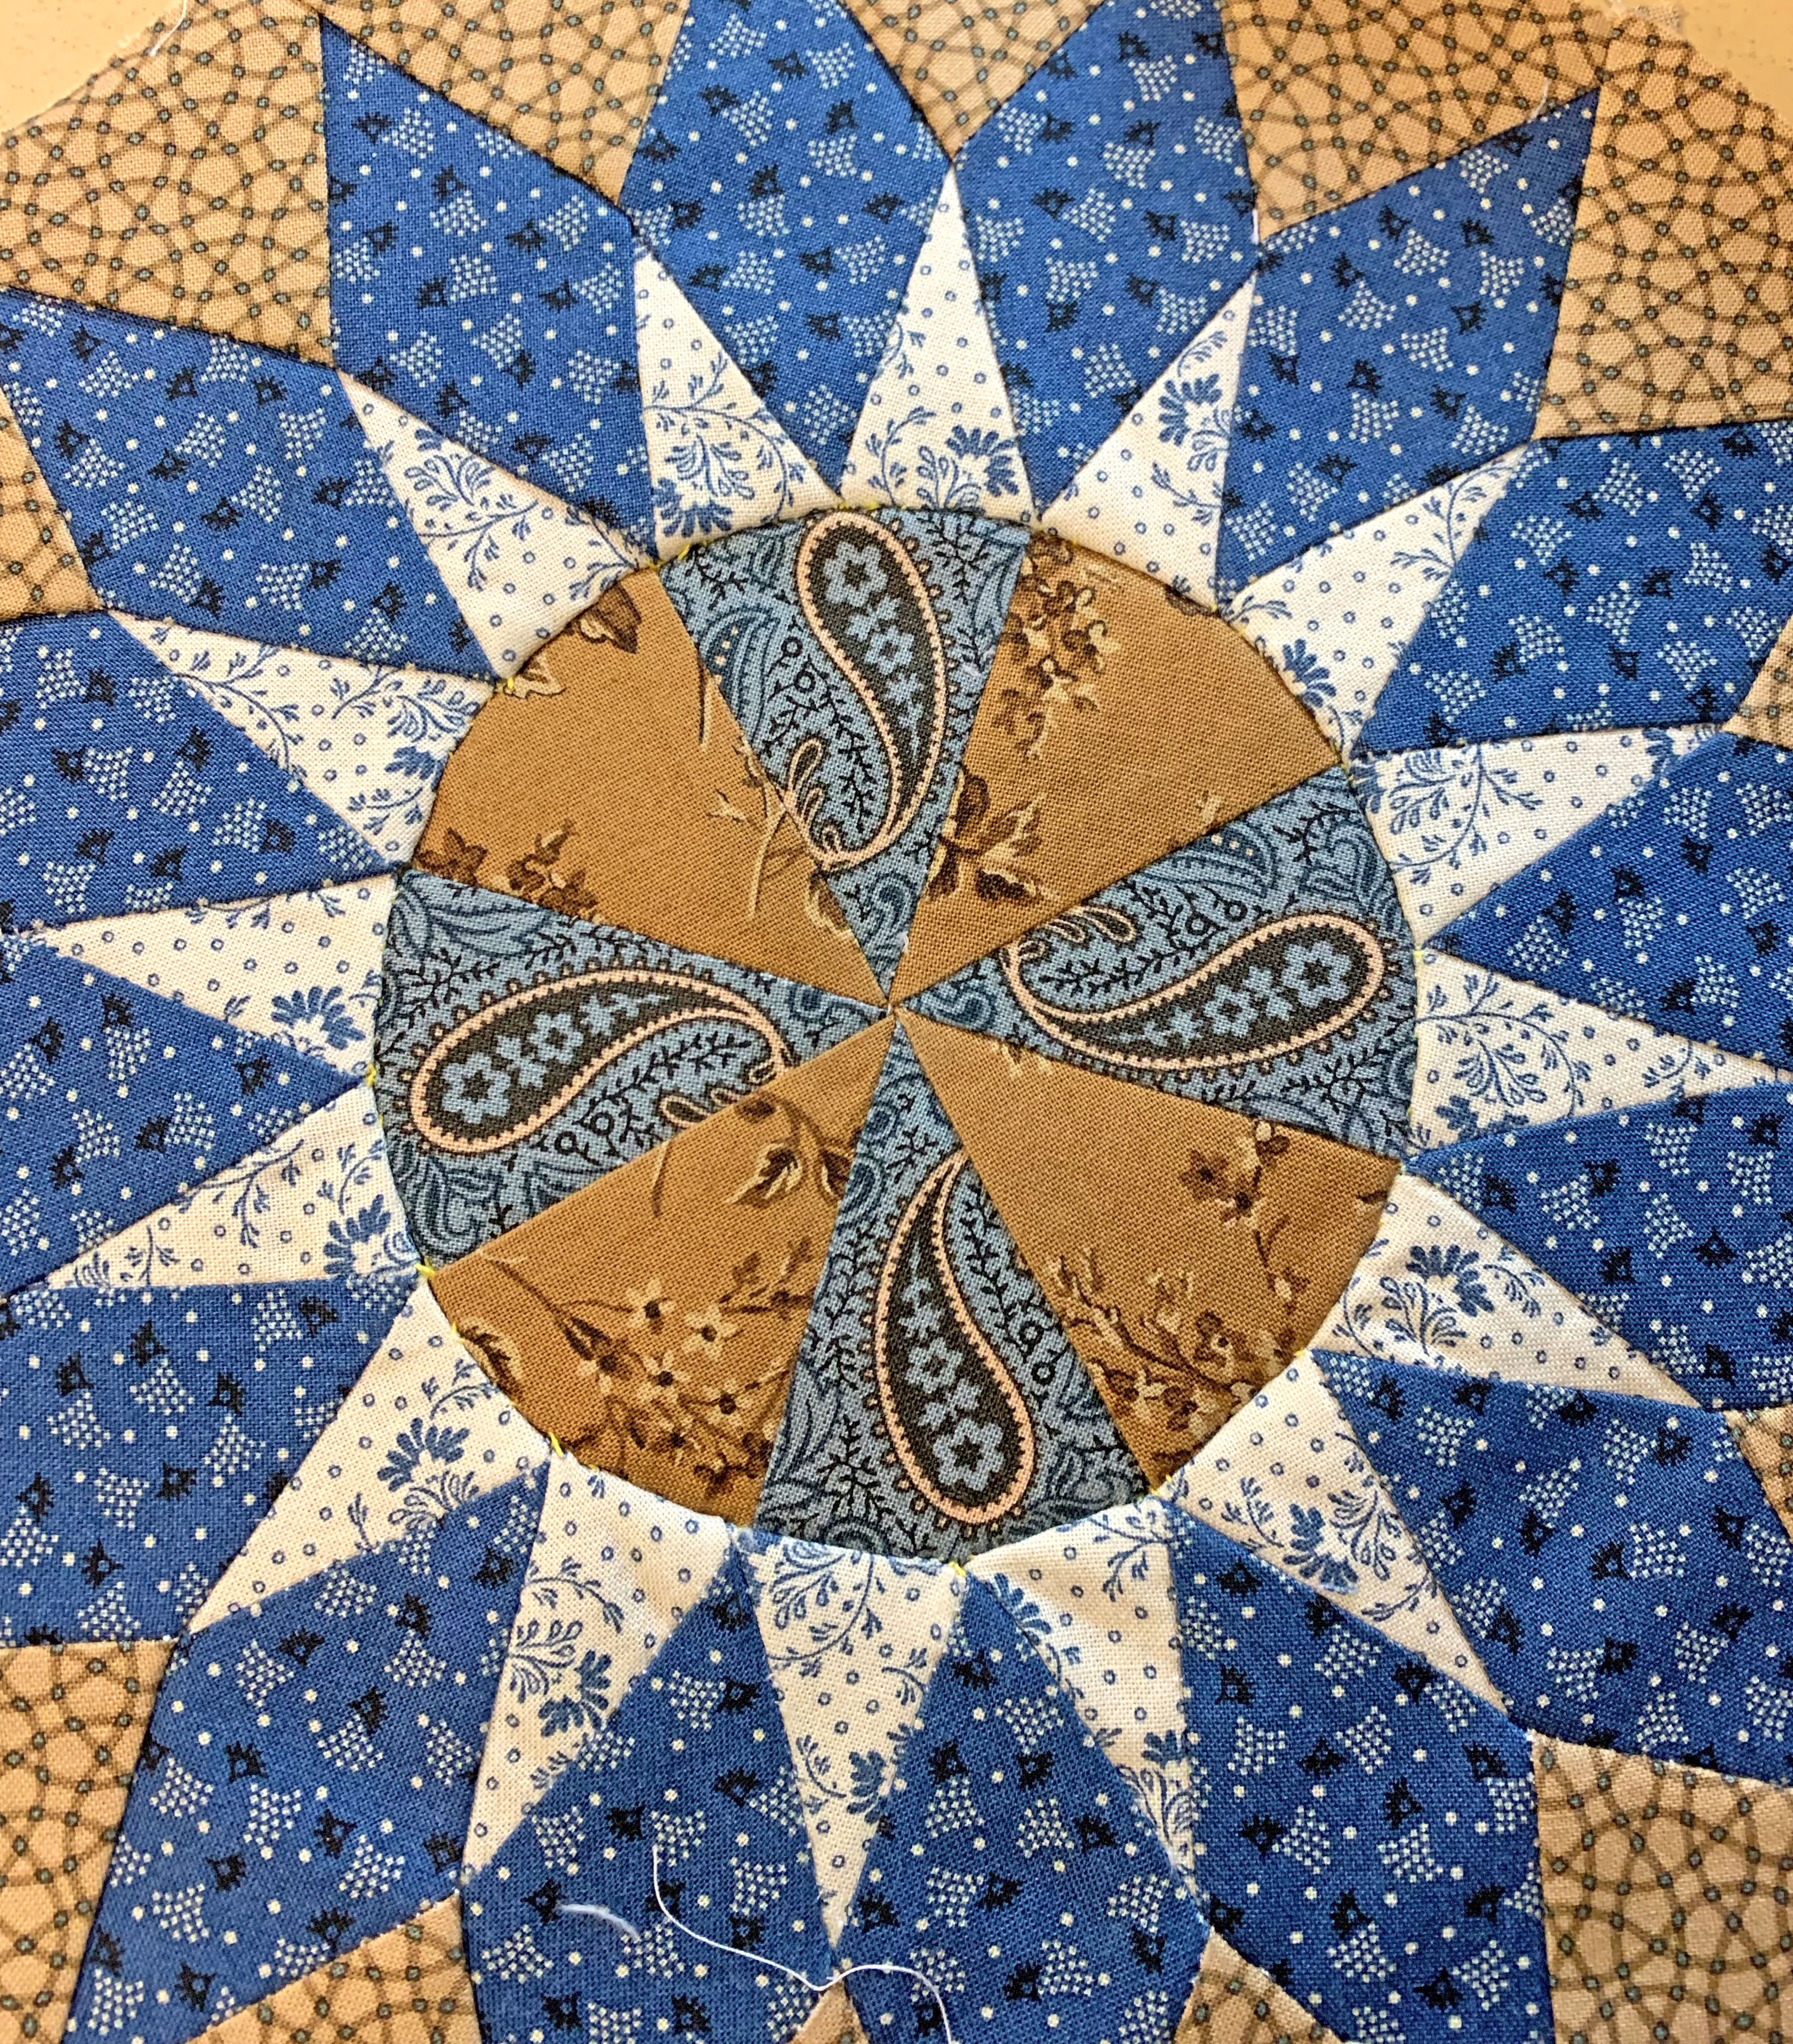
Setting the center circle into the Ring 1 is the most tedious part of making the Bullseye quilt. There are clear instructions and photos in the instructions showing how I match, pin, and then sew the center in place.
In a recent class, one of my students had a really good idea. Her background is in garment sewing and she decided to thread baste the center circle into Ring 1, rather than pinning it. What a good idea!
She tacked the points in place with heavy thread and then thread basted between the tacks along the seam line. Basting the center circle makes it easier to see if you have your points correctly positioned before you sew the circle in place.

My student planned to go to the machine and baste it in place again, before sewing it for real. I would run the machine basting stitches to one side or the other of the first (yellow) basting stitches. Then I would remove the hand basting to keep it from being sewn into the final seam.
On the one hand, this is more work than pinning. On the other hand, it adds precision.
I hadn’t considered doing this when I made my Bullseye quilts, but it’s definitely going to be something I try when I make my next one!


Thanks so much for the tip. I’ve been a garment sewer too so this makes perfect sense!
LikeLike
I diIdn’t even bother to machine sew. I simply handstitched and it turned out perfect. It takes less time to handstitch than to rip it up several times.
LikeLike
I’m very happy that you found a method that works for you :-). Quilting is a lot like yoga… do what works for you.
>
LikeLike
I didn’t know which fabrics I wanted to use for the center of my Bullseye, since I chose fabrics as I went along, so I left the center empty and appliqued it on, after my top was finished. This worked really well. As soon as my quilt hanger arrives, my Bullseye will go above our bed! Then I will go shopping for a new duvet!
LikeLike
Please do send me a picture! I would love see your quilt AND share it on my blog :-).
>
LikeLike