This week’s winner, Lisa Benson, will receive a really fun assortment of Moda Pocket Notepads. Each one is 3″ by 4″, closes with a magnet and has 75 pages. She can keep her favorites and give the others away, keep for stocking stuffers, or gift herself with all of them!
I’ll be back with another Giveaway next Wednesday. Until then you can shop for all sorts of sewing notions, books, and other fun stuff at pieceocake.com!
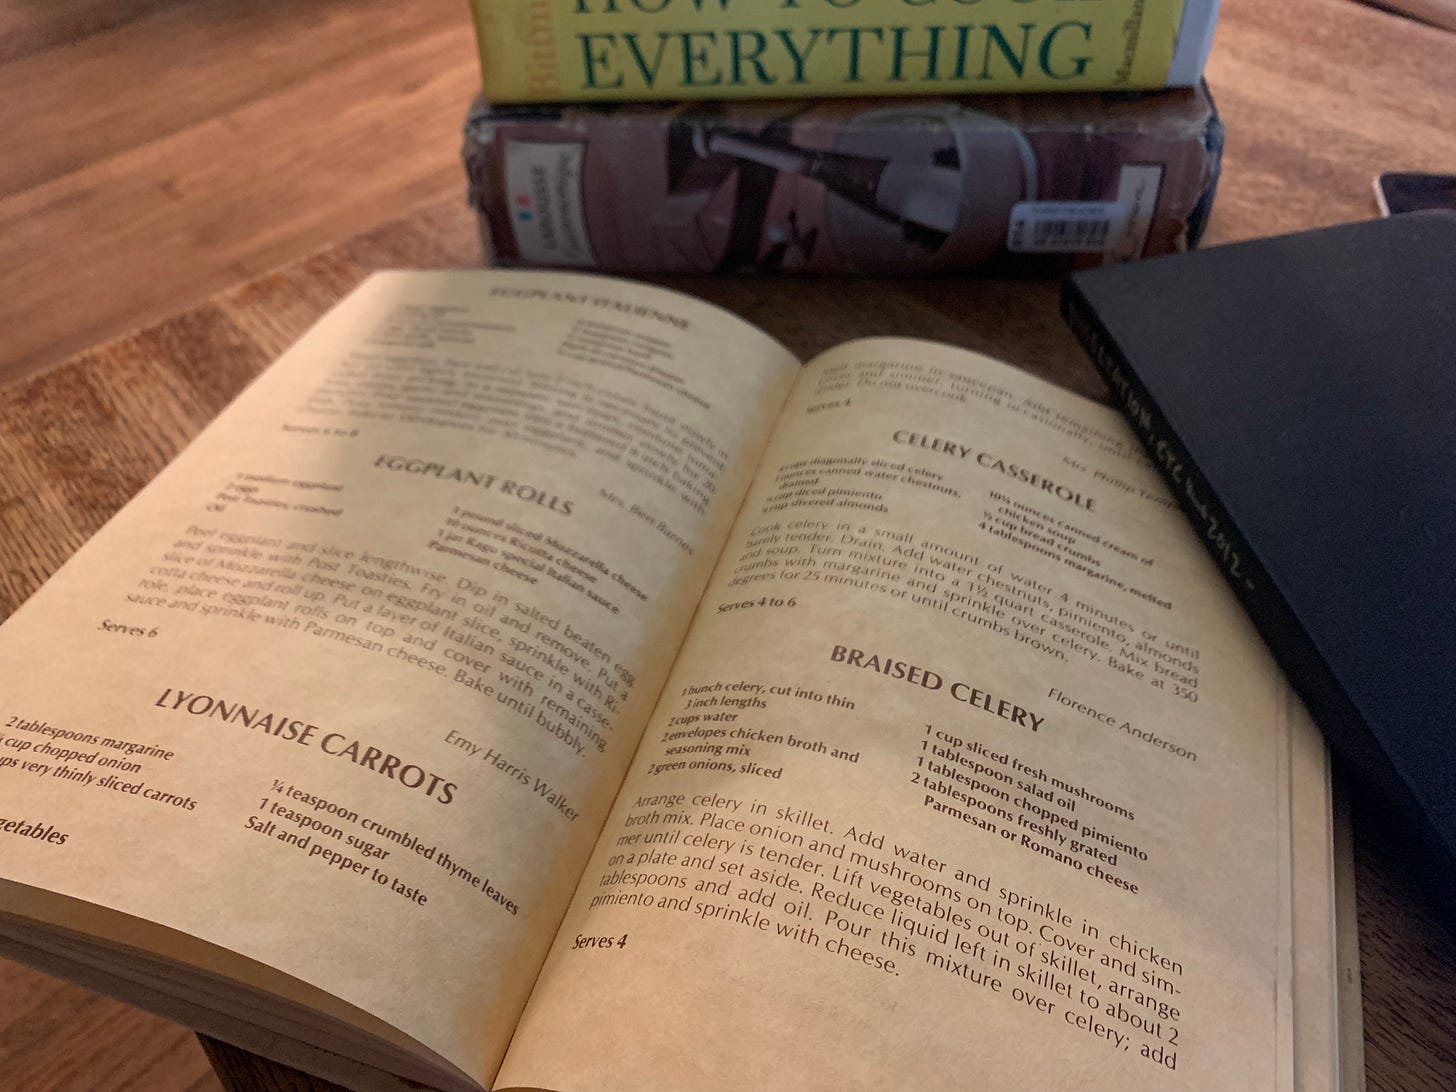
Occasionally, I like to pull a few cookbooks off the shelf and browse through them in search of things I might want to cook. That’s how I discovered a recipe for braised celery, in the San Angelo Junior League’s cookbook, submitted by a Mrs. Evrard Ricci.
Now, I’m familiar with celery. I use it in all the usual ways that Americans use celery—soups, salads, stuffing, snack. But until I saw this recipe, it had never occurred to me that cooked celery could be the main ingredient of its own dish.
Clearly, it went on the list.
Then I looked for variations on the theme. Braised celery, to my surprise, is A Thing. Alton Brown has a basic recipe, which is pretty similar to the one in Mark Bittman’s How to Cook Everything—and both are riffs on the method for “celery in butter” given in the original Larousse Gastronomique. They’re all pretty sparse, and would work best with really fresh, flavorful celery. Alexa Weibel has a much more elaborate version at NYT Cooking, which I plan to try next holiday season. Julia Child apparently has a recipe, but I don’t (yet) own a copy of Mastering the Art of French Cooking, so I couldn’t check it.
I do, however, have a copy of Marcella Hazan’s Essentials of Classic Italian Cooking, which has three recipes for celery: braised and gratinéed with parmesan; braised with potatoes in olive oil and lemon juice; and braised with onion, pancetta, and tomato. That’s the one I ended up making (in our electric skillet, because our gas range died).
Start by sautéing a thinly-sliced onion in oil until lightly golden. Add pancetta, also cut into thin strips (I actually used soppressata, which is what I had on hand). Once the fat on the meat starts to render, add a can of tomatoes (the recipe calls for whole plum tomatoes, chopped coarsely, but I just used diced) along with the celery, cut into chunks on the bias, and season with salt and pepper to taste. Reduce heat to a simmer, cover the pan, and let cook until celery reaches desired tenderness.
It was … fine? The celery by itself didn’t really taste like anything, but the sauce was good. Ultimately, the celery I used was mediocre—it was a package of celery hearts from Sam’s that had been in our fridge for more than a week, and had partially frozen in places (our second fridge has some really cold spots). With better celery, I hope for better results; this is definitely a method I plan to try again.
The leftovers got added to a stew with part of a pot of beans (Rancho Gordo’s alubia blancas, to which I added chopped parsley, sage, rosemary, and thyme) and some sautéed smoked sausage. Both the beans and the celery seemed happier the second time around.
Have any of y’all eaten or made braised celery? Let us know in the comments below.
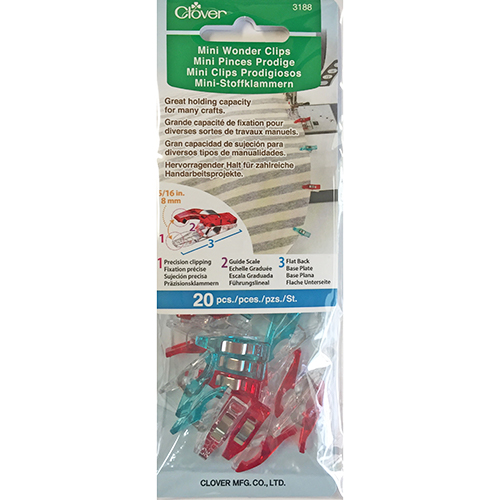
Mini Wonder Clips are perfect for English paper piecing and can substitute for pins in many piecing situations. Connie will receive the 20-count package (we also carry a 10-count package of rainbow-colored clips). Check out this video for helpful tips. The photo below is from our April 20th newsletter. I used wonder clips to hold the binding in place on my Water Lily quilt before Steve stitched it down.
I’ll be back with another Giveaway next Wednesday. Until then you can shop for all sorts of sewing notions, books, and other fun stuff at pieceocake.com!
We carry several excellent threaders in our store. Debbi Russell is the winner of The Colonial Needle Threader, this week’s Wednesday Giveaway! It has two sizes of sturdy wire threaders inserted into a single handle, making it easy to carry in your sewing kit. Dandy!
OLYMPUS DIGITAL CAMERA
I’ll be back with another Giveaway next Wednesday. Until then you can shop for all sorts of sewing notions, books, and other fun stuff at pieceocake.com!
Applique Stitchery by Jean Ray Laurie is one of my all-time favorite books. It was published in 1966 and it is a delightful reflection of the time then—and it is still relevant today. The book is out of print, but Judy Fine had a spare copy and she gave it to me to share with one of you! The random number generator has chosen Pam Wilkerson to receive this book for her collection!
I showed this book in the Time Out below…
I’ll be back with another Giveaway next Wednesday. Until then you can shop for all sorts of sewing notions, books, and other fun stuff at pieceocake.com!
I did something crazy, on purpose, just for you, so that I could share this learning experience. I will post this on the blog in a few days. Here we go:
Do you remember the two Spring Bling quilts I made for my class with MJ Kinman? The one on the left has turned-edge machine appliqué and I used glue to hold the seam allowances in place. I used SoftFuse for the large raw-edge applique shapes in the quilt on the right.
The fabric came from my stash and I prewashed all of it sometime in the past. There are a lot of hand dyes in these quilts and I didn’t test the fabric before making the quilts because I was lazy. The blue quilt really needed to be washed to get the glue out. The red quilt needed to be washed because I wanted to see how the SoftFuse would look after washing.
This is where the crazy starts…
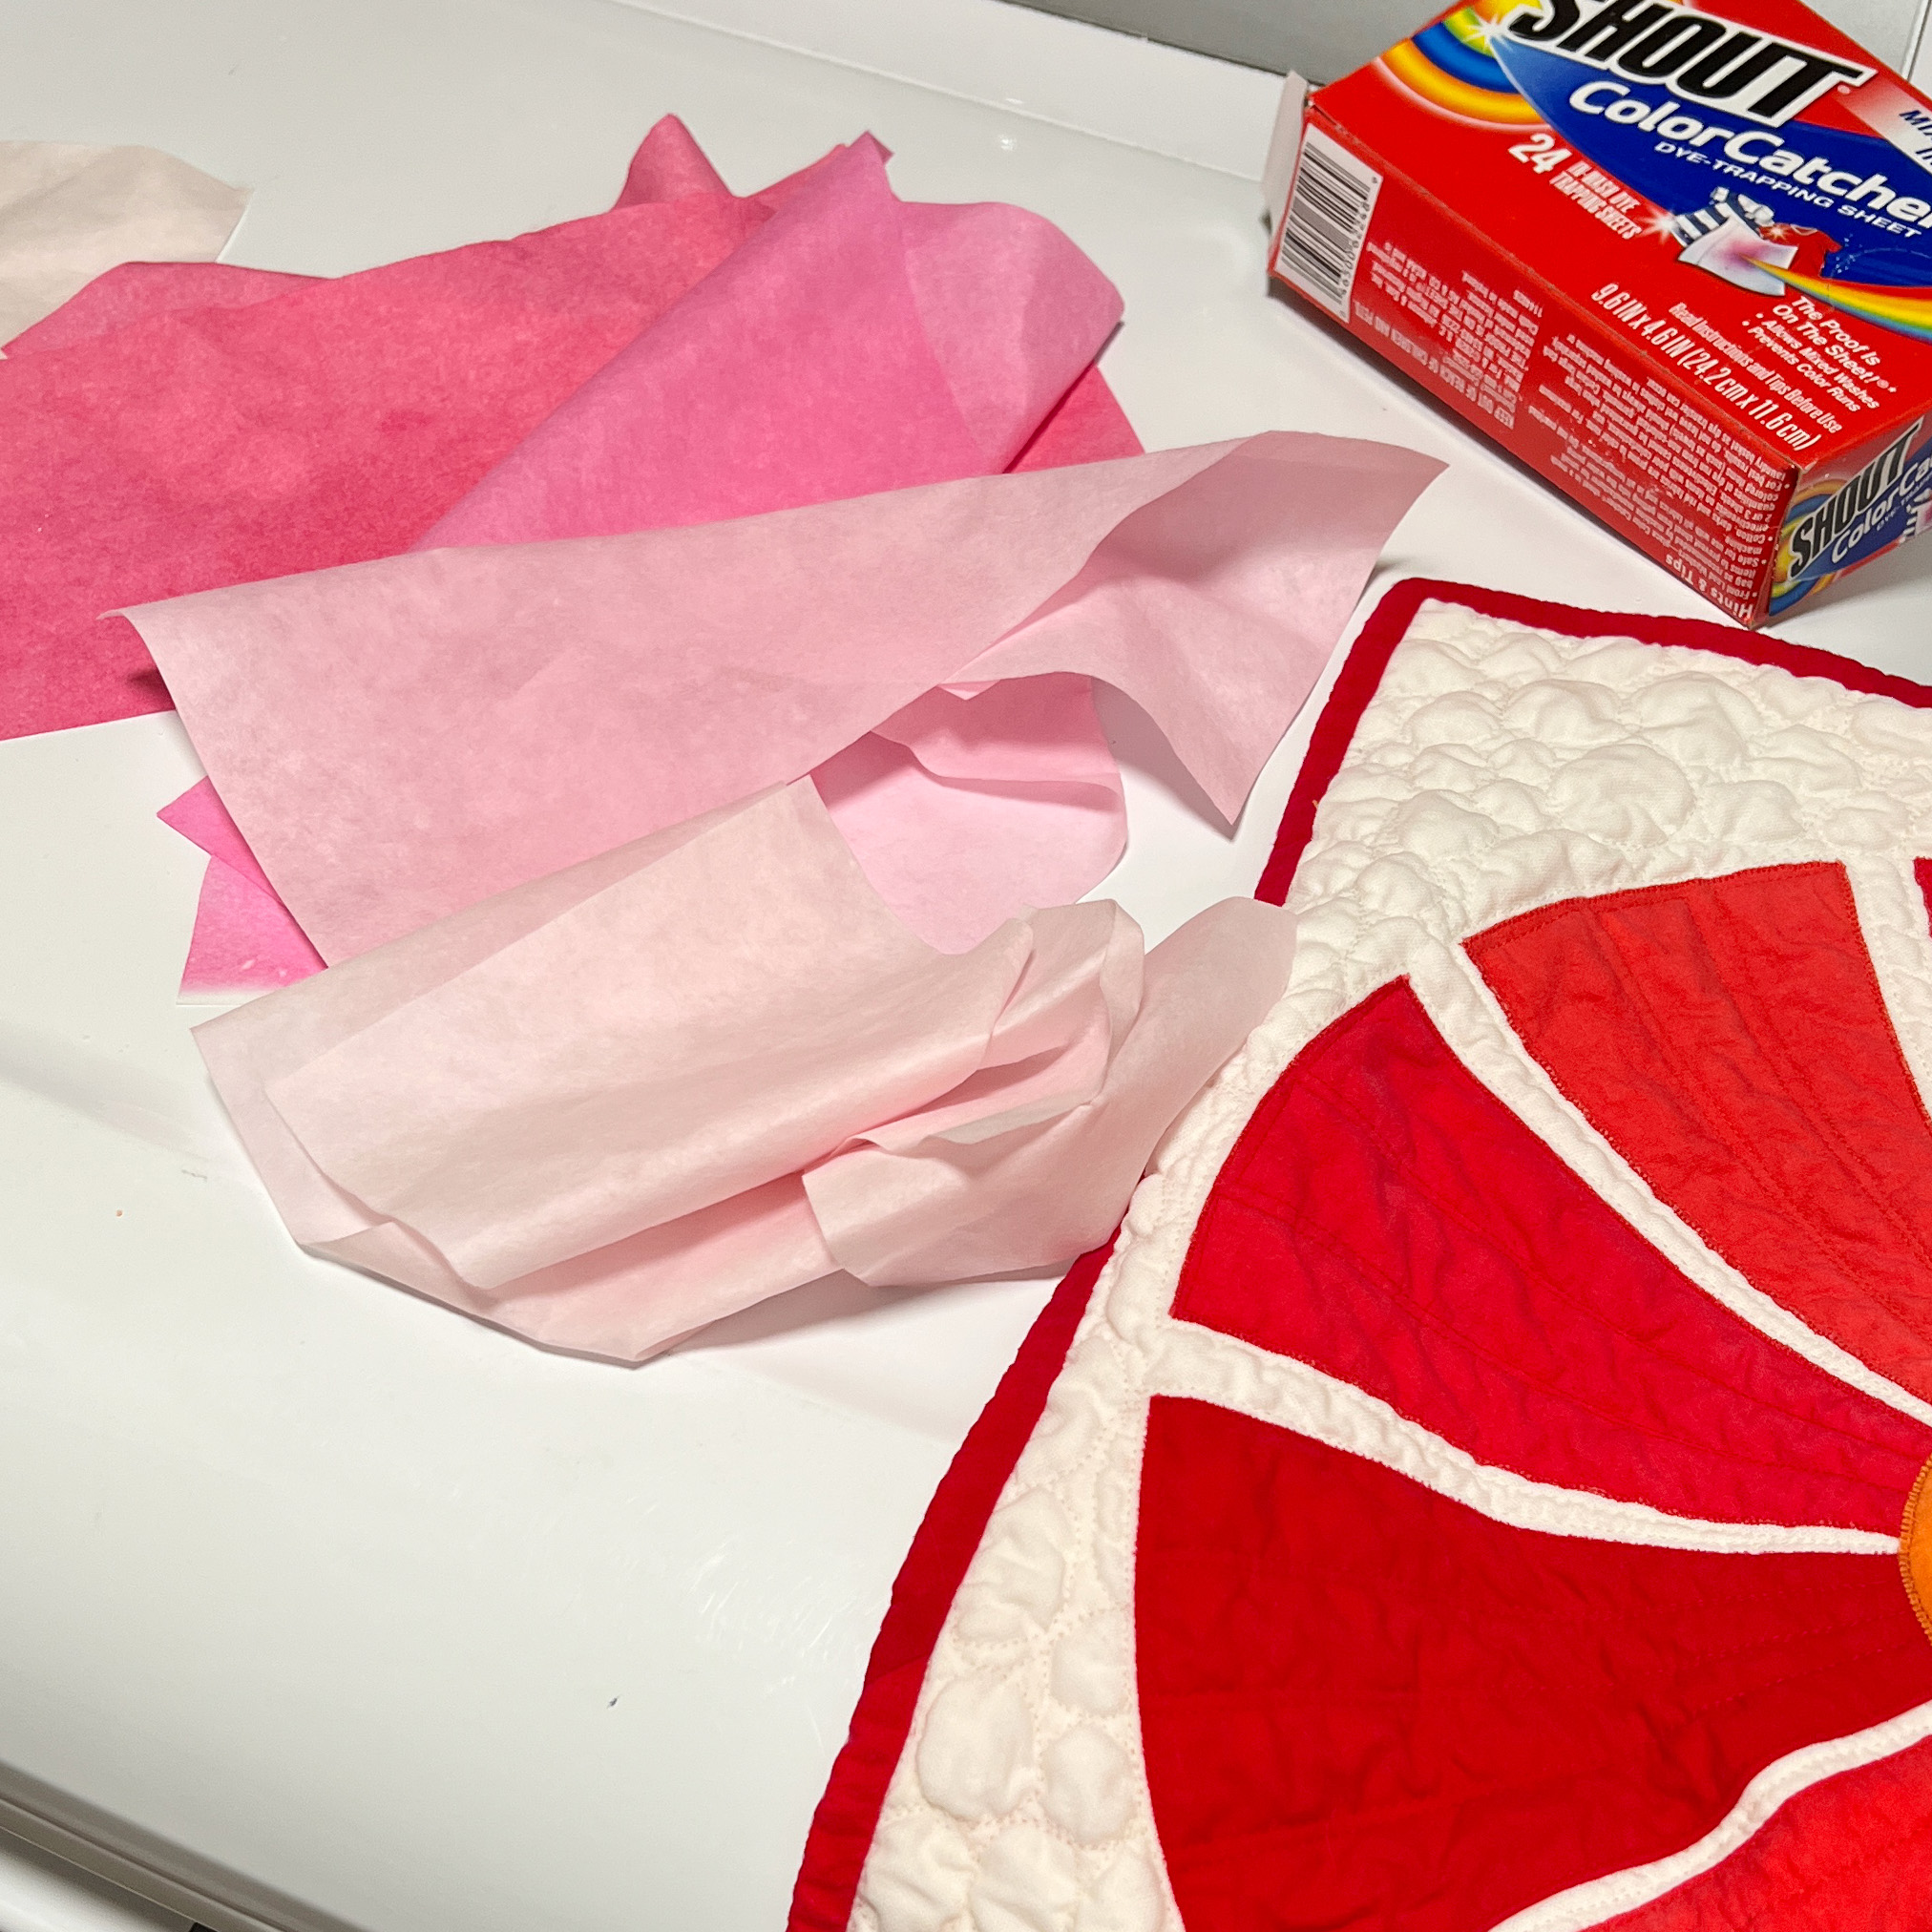
I put the red quilt in my washer with 3 white dish towels (not good ones), 1 Color Catcher, and 1 TBLS of Orvus Paste (because I have a huge jar of it) and 3 teaspoons of Retayne mixed in water. I chose Retayne in the hopes that it would fix the dyes. It did not as you can see in the photo on the left.
TIP: Do not let the quilt dry at this point! Wash #2: 2 Color Catchers, plus 1 TBLS Orvus Paste and 3 teaspoons of Synthrapol mixed in water, added to the washer, washing in hot water. The dark pink you see in the photo above, right, is one of the Color Catchers. I moved on to washes #3, #4, and #5 using the same washing products in hot water—the white fabric got cleaner with each wash.
Five washes had taken enough out of the quilt and the white looked good so I placed the quilt face up on towels on my table to dry. I checked it every 10-15 minuted to be sure none of the color was bleeding.
I was not done tempting fate…
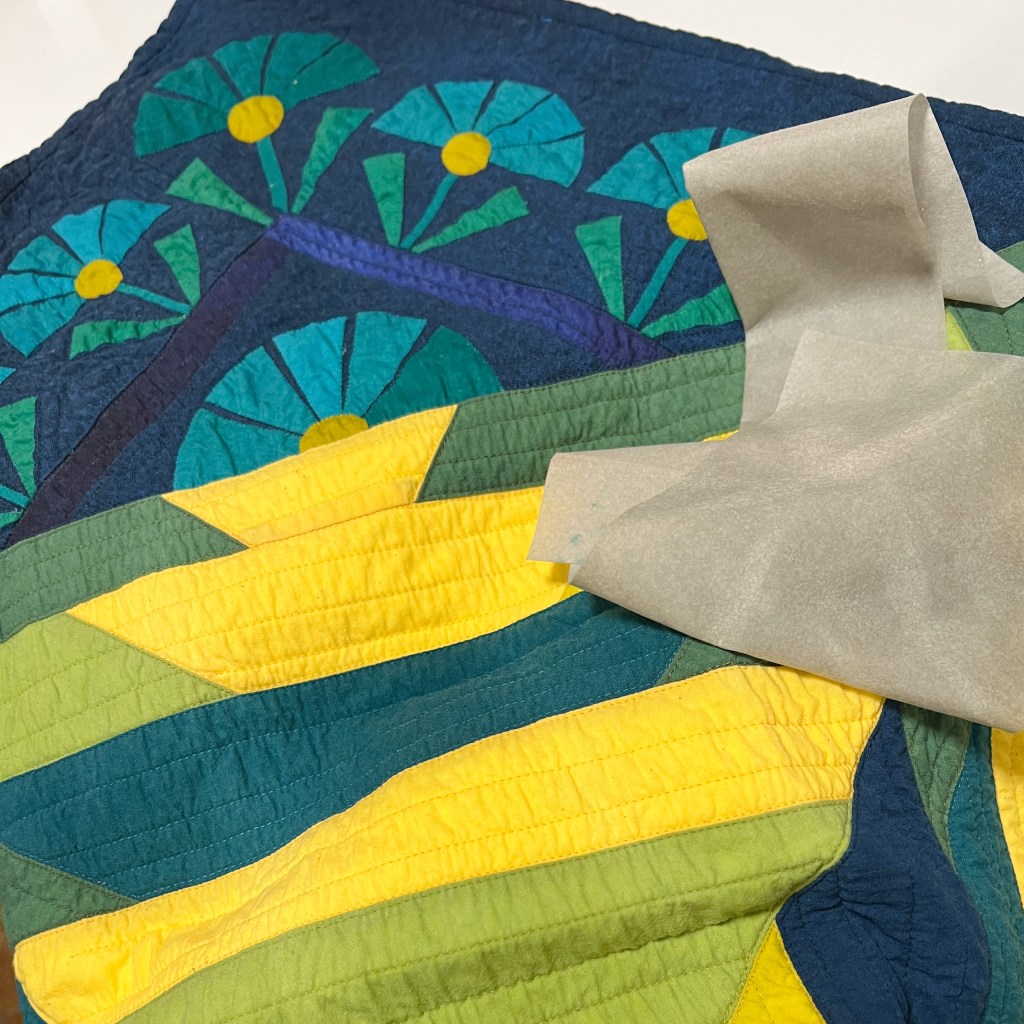
The blue quilt still needed to be washed. This was harder for me because there is a lot more work in this one but, at this point, it felt like a science experiment. I used the same mix of Color Catchers, Orvus, and Synthrapol in hot water…
The Color Catchers picked up some dye but the fabrics all looked good. Amazing! I laid it on more towels next to the Sunrise quilt, kept an eye on both as they dried, and eventually turned a fan on them.
TIP: Do not re-use Color Catchers, even if they look white. The chemicals are gone. Washing changed the quilts. The texture of the quilting is more prominent. Five washes in hot water had an effect on the colors in the red Sunrise Bling quilt, the colors in the blue quilt look about the same as they did before.
What are the important take-aways?
If you care deeply about the quilt you are making, test wash your fabrics before you begin!!!!
Do not start washing late in the day because it could take longer than you think.
Wash with Color Catchers and Synthrapol. The instructions say to use hot water and it makes sense to do what they say works best. And use either Retro Wash, Orvus Paste, or All Free and Clear. You could also try Dawn liquid dish detergent but only use a very tiny bit in your washer.
Do not let the quilt get dry when dye is running.
Do not put the quilt into the dryer until you are absolutely certain that colors are not running.
Remain calm.
Think carefully before you get a quilt wet. I was mentally prepared for the worst outcome so I forged just did it. If you are going to be heartbroken if disaster strikes, it might make sense to live with your quilt the way it is, unwashed.
But what about prewashing fabric?
I have been prewashing my fabric with Retro Wash, Retayne, and Color Catchers—but if the Color Catchers came out with color, I have not been rewashing the fabric. That is not smart and I’ll be washing until the Color Catchers come out clean from now on.
It’s possible that prewashing with Synthrapol rather than Retayne could be a good idea. I am going to think about it. And, from here on out, when using fabric that I know tends to bleed (like red hand dyed fabric!) I will test them before using them in a quilt.
I hope my experience helps you when you wash your next quilt :-).