Mile High Chiffon Pie

My very good friend, Laurie Mealy, shared her grandmother’s recipe with me. I made it today. Mine is lumpy (no, that isn’t corn!) but it tastes great! It wasn’t particularly hard to make and will be a lot easier the next time. Here’s a link to the recipe:

Laurie’s Grandmother’s Mile High Chiffon Pie

MileHighChiffonPie.jpg

And here’s the recipe as a JPG. Below it you will find the original recipe. Laurie’s grandmother obviously knew what she was doing. My recipe has more instruction so that the next time I make it, I’ll have a better chance of it not being lumpy :-).

Lauries Grandmothers MileHighChiffonPie.jpg

Lauries Grandmothers MileHighChiffonPie.jpeg

The pecan pie story…

I decided to try a new pie crust this year, using Steve’s Gluten Free Cake Flour and a pastry recipe from Patisserie GF. I made two batches and refrigerated them overnight thinking I’d get the pies in the oven pretty quickly the next morning.

Here’s what I learned: pastry is different from a pie crust. I realized pretty quickly that that was not going to work (my first ‘wrong’). I turned to my no-fail pie crust by Annalise G Roberts that I’ve written about before (click here). Here’s a link to the pie crust recipe but be aware that it is written for the Authentic Foods Classical Blend GF flour. I can’t say how it will work with other GF flours. It didn’t take long to make the two crusts, but it threw me off my stride.

Then I made the 1st pie filling. I used a recipe from United States of Pie by Adrienne Kane, an excellent resource. Her recipe is similar to many except that she recommends toasting the pecans before adding them to the mix.

I had everything measured out, got the first pie in the oven, and then realized that I had not added the dark Karo syrup (2nd ‘wrong). Words escaped my lips but I decided what the hey (hay?) and pulled the pie out of the oven. I added the Karo syrup and tried stirring it in. Not a good plan, so I dumped the filling into a bowl and stirred it up, returned it to the pan and put it in the oven.

At this point, I was beginning to have real doubts about my mental faculties. However, in my defense, Steve was bustling around the kitchen. He was being helpful but I realized later that I am used to concentrating more when baking. Not his fault, it’s on me that I was easily distracted.

I made the 2nd pie, put it in the bottom oven, set a timer for it and waited. It was when the buzzer went off for pie #1 that I realized that somewhere in there I had (3rd wrong) turned off the top oven!!!!! Geez, Louise. No wonder it looked like it wasn’t cooking. I turned up the heat because, why not?

Both pies got done at the same time, they look about the same, and they both tasted great. I was stunned.

Here’s what I learned:

  • If you have a no-fail crust recipe, use it.
  • Pecan pie is very forgiving.
  • 3 wrongs sometimes to make a right.
  • As Buzz Lightyear says: Never give up. Never give in!

Honey Pecan Pie, with or without the crust…

Pie crusts are tasty, but you don’t always have the time or inclination to make one. When that’s the case, just say no to the crust and skip to the good part!

IMG_7022

I made these two crust-less Honey Pecan pies recently and posted the photo on Instagram. At least one person asked for the recipe. Here you go:

Honey Pecan Pie, adapted from allrecipes.com and beefolks.com

  • 1 cup honey
  • 3 eggs, beaten
  • 3 tablespoons butter, cut into small pieces
  • 1 teaspoon vanilla extract
  • 1 cup chopped pecans
  • 1 pinch ground nutmeg
  • 1 recipe pastry for a 9” single pie crust (or not)

Directions:

  • Measure out the ingredients so that you can add them quickly.
  • Prepare the pie pans with either a crust or by spraying with non-stick oil.
  • Beat the eggs well with a fork, in a small bowl.
  • Bring the honey to a boil in a medium saucepan.
  • Quickly whisk in the eggs. Sometimes I leave the heat on low, sometimes I don’t. I’m not sure that that matters.
  • Add the butter, stir until melted.
  • Add the vanilla, nuts, and nutmeg. Blend and pour into pie plate.
  • Back at 325° F (165° C) for 25 minutes or until set.

Update: To keep the eggs from cooking up when they are added to the honey, bring the honey to a boil over medium-low heat and don’t bring it to a rolling boil. Be sure to really whisk the eggs both beforehand, in the bowl, and quickly, once they are in the honey.

Side note: When I make a crust-less fruit pie, I add crumbles on top made from flour, sugar, and butter and sometimes cinnamon. That adds a crust-like flavor without the bother of making a real crust.

Happy Thanksgiving!

Today is a time to consciously give thanks and I am thankful for many things:

  • I’m thankful for my family (who love me even when I am stressed and, therefore, cranky).
  • I am thankful for my friends. You know how there are people who have hundreds of good friends? I am not one of those people. I’d like to be, but it’s not my nature. I have a few good friends and I am so very lucky to have them in my life.
  • I am thankful that I am healthy. In fact, I recently found out that I don’t have osteoporosis—just garden-variety osteopenia along with just about every other post-menopausal woman I know. Yay! One less thing to worry about.
  • I am especially thankful that my family and friends are pretty healthy as well.
  • And I am thankful for pie…

Pies

I baked pumpkin, pecan, apple, and cranberry-apple pies yesterday. Steve rolled out the (gluten-free) crusts which was a big help.

I used a new apple pie recipe, sent to me by my mom’s friend, Coralee. It’s from allrecipes.com: Grandma Ople’s Apple Pie. It calls for a lattice-crust which is too hard to do with a GF crust so I used a cookie cutter to cut pieces instead:

Pies2

Watch the video and make notes because the recipe itself is not very complete. I realized after 2 false starts that the order in which to add things matters. You combine simmering melted butter with 3 TBS flour to make a paste (sort of like white glue, not a stiff paste). Stir in white sugar (while still simmering), then brown sugar, and then water in a saucepan. Bring to a boil, then simmer for a bit… they say 5 minutes but I think that might be too long. The point, I think, is to make a toffee sauce.

I made the sauce and let it cool too long. I think it would work a lot better to have the pie ready to pour the sauce onto as soon as you are done simmering. It looks like it is going to be a very good pie!

Next year we will be in NYC with Jeff for Thanksgiving. He is, as I write, sitting in a restaurant watching the parade and having brunch which is a lot warmer than being on the street in the wind and snow.

Parade2

Even though I have never been much of a parade-watcher, the Macy’s Thanksgiving Parade really does look like fun. I’m looking forward already to 2015!

Parade

I hope you all have a happy Thanksgiving!

Well, it’ll taste good…

I made chocolate cake for our Mother’s Day dinner. (All the mothers did a little cooking, Steve is grilling.) As you know, I bake a lot and I’m not sure why, but this cake fought back.

FrankensteinCake-1

I made the cake layers yesterday. The recipe starts with melted, un-sweetened chocolate pieces. After that cools, you add it and the vanilla to the batter in the mixer. I added the vanilla to the lukewarm chocolate thinking that would make adding them to the batter easier. Not so much… the chocolate got stiff (I believe the term is ‘seized up’). I managed to blend it all and the batter looked normal so I put the cake in the overn. The layers didn’t rise as much as usual and the cake was a little crumbly but I figured that that would be OK.

Today I made the frosting. It calls for a box of powdered sugar. I didn’t have a box, I had a bag, so I measured the sugar (4 scant cups). I must has used too much because the frosting got hard not long after I started spreading it. In fact, it didn’t take long before it started tearing the cake apart. I gave up on it when I made one obvious divot in the top edge. Sigh.

FrankensteinCake-3

I made another half-batch of frosting and it hardened pretty fast too. Mom says it could be the humidity in the air.

FrankensteinCake-2

Honestly, while it isn’t a show-stopper, the finished cake has kind of a nice texture… tree-bark-ish. I know that it will taste good and that’s what really matters.

I did think, though, that if I were a new cook and this happened I might be tempted to give up on making cakes from scratch. If that’s you, please don’t let one cake stop you from baking. These things happen :-).

Silicone baking cups!

The New York Baking Company contacted me to see if I would like to write an honest review of their silicone baking cups. It took me a while to realize that they probably contacted me because of my blog name, piece o’ cake, rather than the fact that I sometimes write about baking but that’s OK because I do, in fact, sometimes write about baking!

Image

I’ve seen these silicone baking cups before but had never bought them. Not because they are too expensive (they aren’t), but rather because I wasn’t sure how they would work. Well, I can honestly say that they work great!

I made the Birthday Cupcakes from The How Can It Be Gluten Free Cookbook from America’s Test Kitchen. The problem with gluten free cupcakes is that they have a tendency to fall apart as you peel them out of the papers or try to remove them from a cupcake pan—more so than cupcakes made with wheat flour do. Using the silicone baking cups for GF cupcakes provides a good test for this product.

Image

The baking cup released the cupcake without tearing it up! I didn’t coat the silicone baking cups with butter, oil, or a spray.

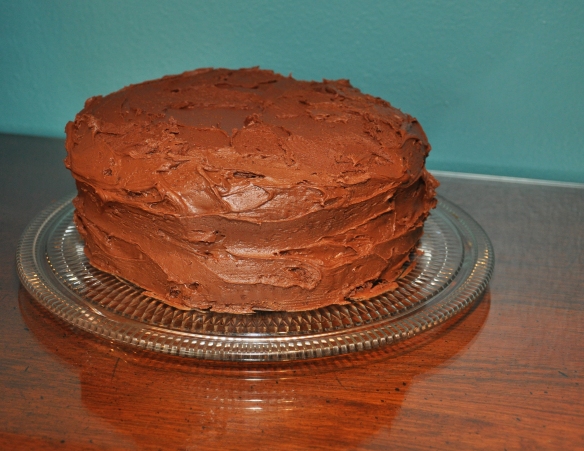
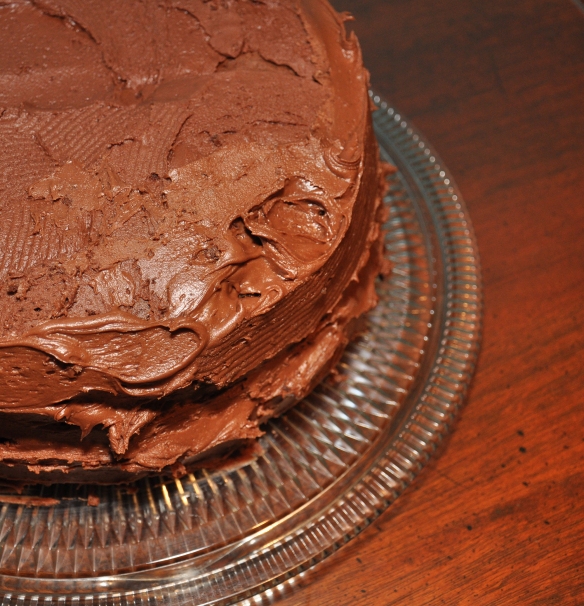
Our grandson, Jack, was spending the night so I decided to frost the cupcakes with peanut butter frosting. Jack loves peanut butter! I used a new recipe which said to blend together 4 tbls butter, 1/2 cup honey, 1 cup smooth or chunky peanut butter. I added chocolate chips.

Image

This frosting is not stiff because you don’t add powdered sugar. Once I realized that I re-read the recipe and it said to place the frosted cake (cupcakes for me) 2 1/2″ beneath a hot broiler for about 1 minute. It would never have occurred to me to do that with a frosted cake but what the heck… I decided to give it a try. (And, no, this is not an April Fool suggestion :-).)

Luckily Lorna was with me. She said silicone does not like to broil and sure enough, the package says not to heat the silicone baking cups above 475°. I carefully removed the frosted cupcakes from the baking cups which was a lot easier than I thought it would be. The baking cups sort of turned inside-out, ejecting the cupcakes. I placed the cupcakes on a baking sheet and slid that under the hot broiler.

Image

The recipe said to watch the cake carefully and pull it out when the frosting bubbled, but before it burned. That took less than a minute and even so, some of my cupcakes are browner than I would like. The frosting didn’t exactly harden, but it did get less soft once the cupcakes cooled. They are pretty on the plate and they were so very tasty!

Image

I did put the silicon baking cups back on the cupcakes that were not immediately eaten to keep them from drying out. That, too, worked like a charm.

My honest review of the Silicone Baking Cups from The New York Baking Company is that they are truly wonderful! I have 12, I’m going to get 12-24 more because I know I’m going to be using them a lot.

Side Notes:

  • The cookbook from ATK is a wonderful, marvelous cookbook! I made the flax bread too (twice!) but that’s another story.
  • This frosting would be very tasty on bread—broiled or not.
  • And now that I think of it, baby marshmallows would be a nice addition to this frosting.