This is a guest post from Lorna!
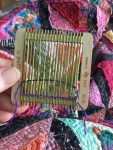
A while ago, I had an idea to use the Purl & Loop Minute Weaver to make a design for my Yazzii organizer. I love beautiful thread, and this seemed like a fun way to work with it. The woven squares are sewn to a piece of dark blue wool that is then sewn to the top of my Yazzii.


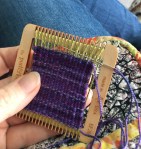
I decided to just use #3 perle cotton thread (including some Painters Perles) for the loom. The squares are pretty fast to put together, and you can create different looks by switching up the colors, the size of the thread, maybe using wool thread. I made a couple of “tiny rugs” with fringe using the instructions from Jack’s (my 10-year-old) wee weaver. Here’s a picture story I made for you:

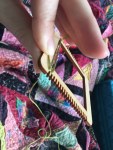


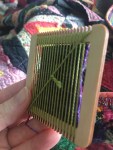


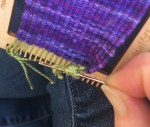


After a few tries at finger tying the knots in the fringe, I thought of using the eye of a needle. I grabbed a chenille needle that I’d been using in the weaving (from the assorted pack by Tulip) with a big eye, and it worked perfectly. Varied chenille needles worked for sewing/embroidering the squares to the wool, and later the wool to the yazzii.
Once the squares were made, I arranged them, and pinned them to the wool. Even though, or maybe because, my design was purposefully haphazard, pinning them all down helped a lot.


I embroidered with #8 perle cotton (again, including the painter’s pearl) and Judith Baker Montano’s Embroidery & Crazy Quilt Stitch Tool. Embroidery is new to me, and it was actually really easy to get rolling with the instructions. I picked a simple stitch, and went for it – my very first awkward stitches I kept. Crazy, right?! I tried different stitches, mixing it up, and at some point I thought of embroidering the squares before I attached them.


It was nice to have a project that was small enough to work on anywhere – on the couch, outside on the porch while Bear (my 5-year-old) played. And I discovered I enjoy handwork.


Gran (Becky’s mom) gave Bear the button stash that the two of them had played with when he was a toddler (he still loves to get it out and sort through them). I found some wonderful pieces, and used them as part of securely attaching the whole thing to the Yazzii. I feel like Gran would approve of her tiny puppy on the tiny rug. Altogether, a fun learning project, AND I like it enough to keep looking at it.