Rebecca Wolf wrote a few days ago to share this happiness…
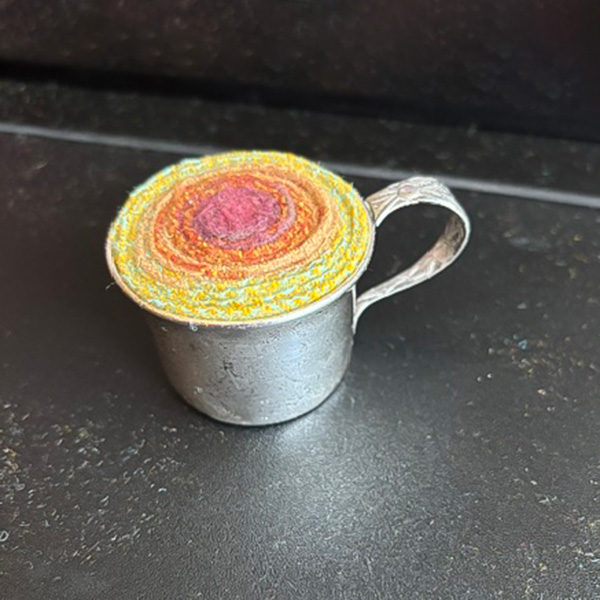
Hi Piece O’ Cake! I viewed the video on making pincushions out of any type of vessel with rolled wool….I didn’t know one video would send me searching through the house for pin cushion containers, but it did. Found this sterling baby cup that was my mother in laws, so circa 1924. I polished it up and what a delight to make this pincushion. It is fitting since my mother-in-law was an amazing quilter. I think she would approve. ❤️❤️❤️
I’m sure she would love this!!! Thank you for sharing it with all of us :-). If you missed it, here’s a video about rolling felted wool into pin cushions:
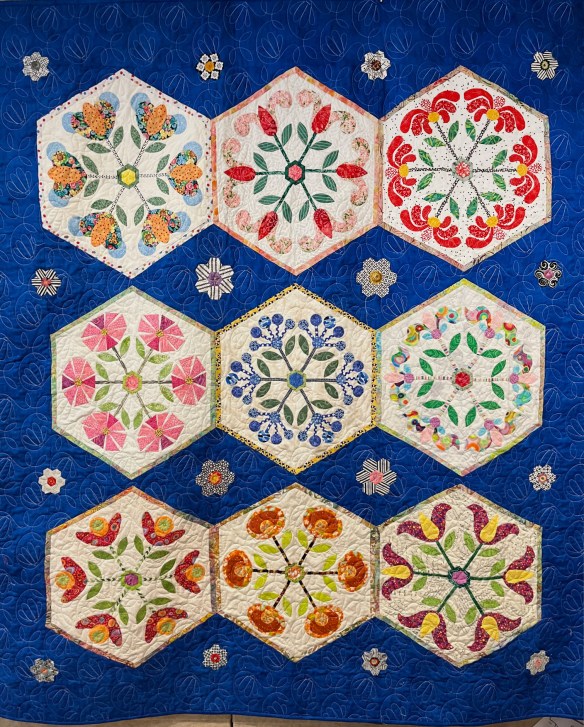
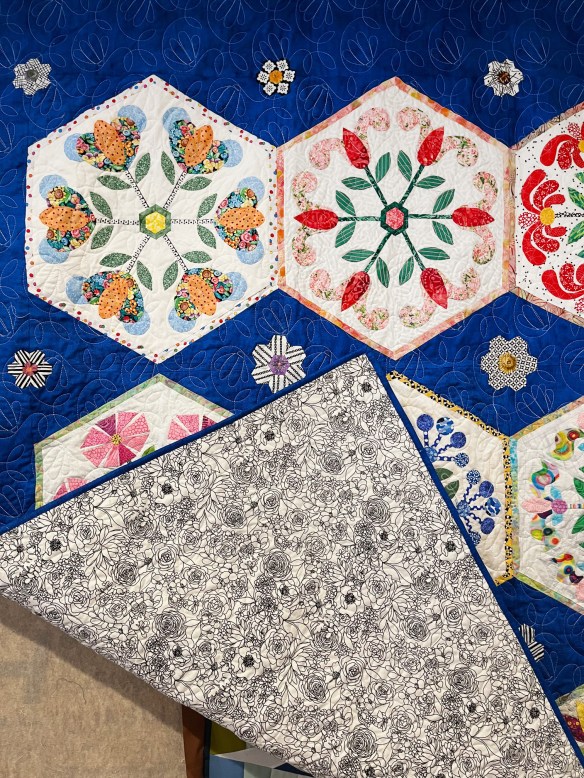
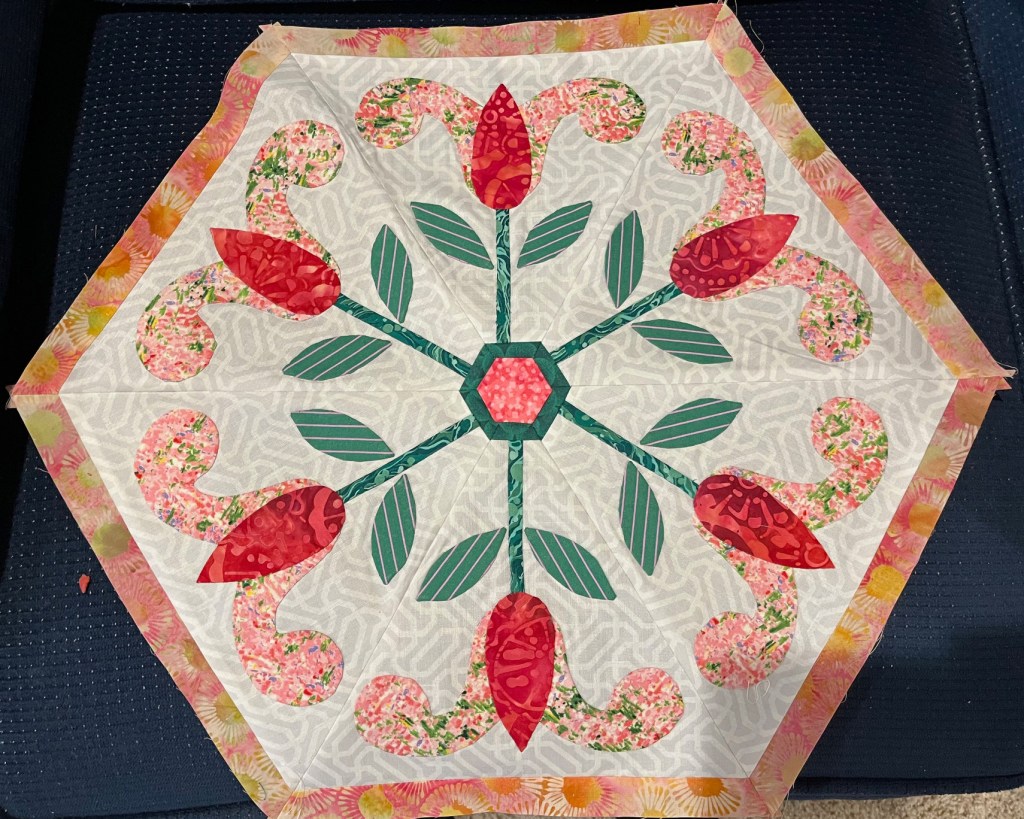
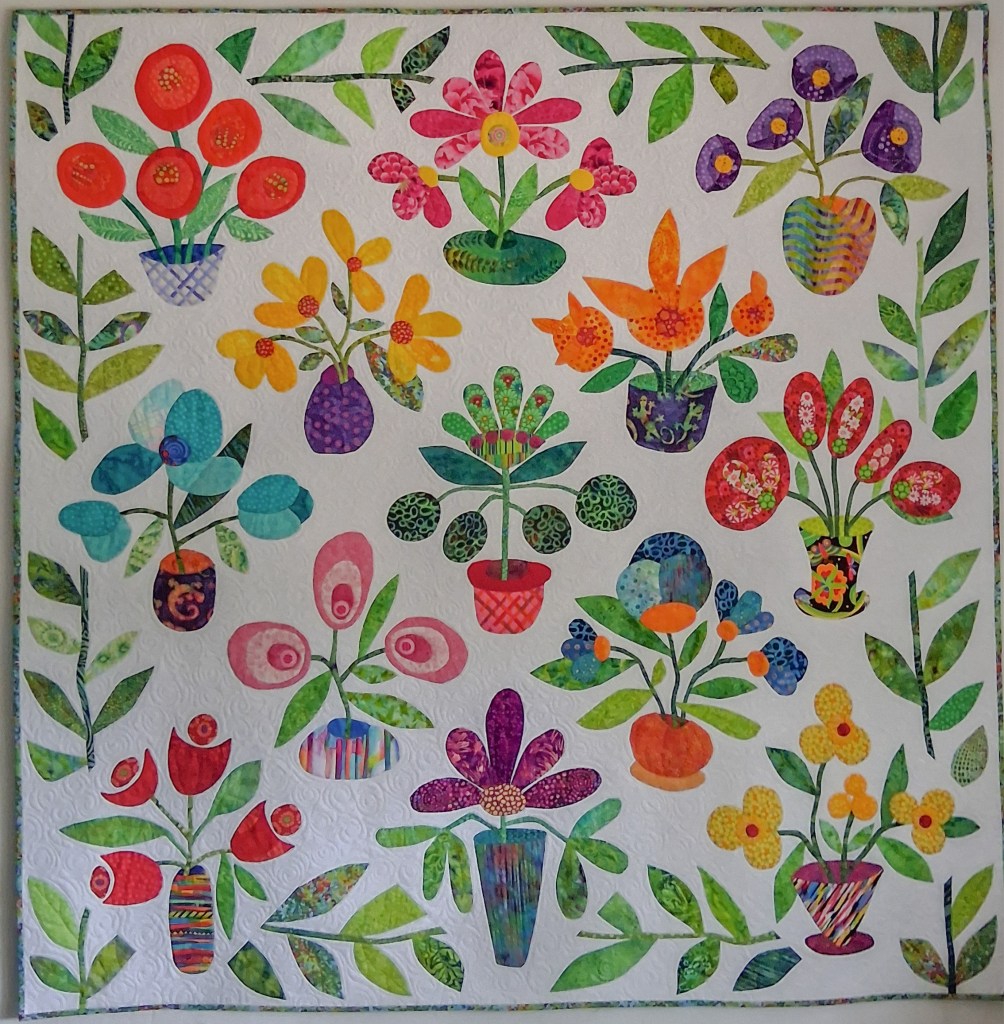
Susan Skeel sent me these photos of her newly finished Hexie Quilt Garden quilt saying: “This was great fun. I added an inch strip between rows to help with bulk and meeting points.”
Susan, you did a great job! The colors you used are spot on and the narrow strip that separates the points is a very good idea. I also like you quilting pattern very much. Well done and thank you for sharing your quilt with us!
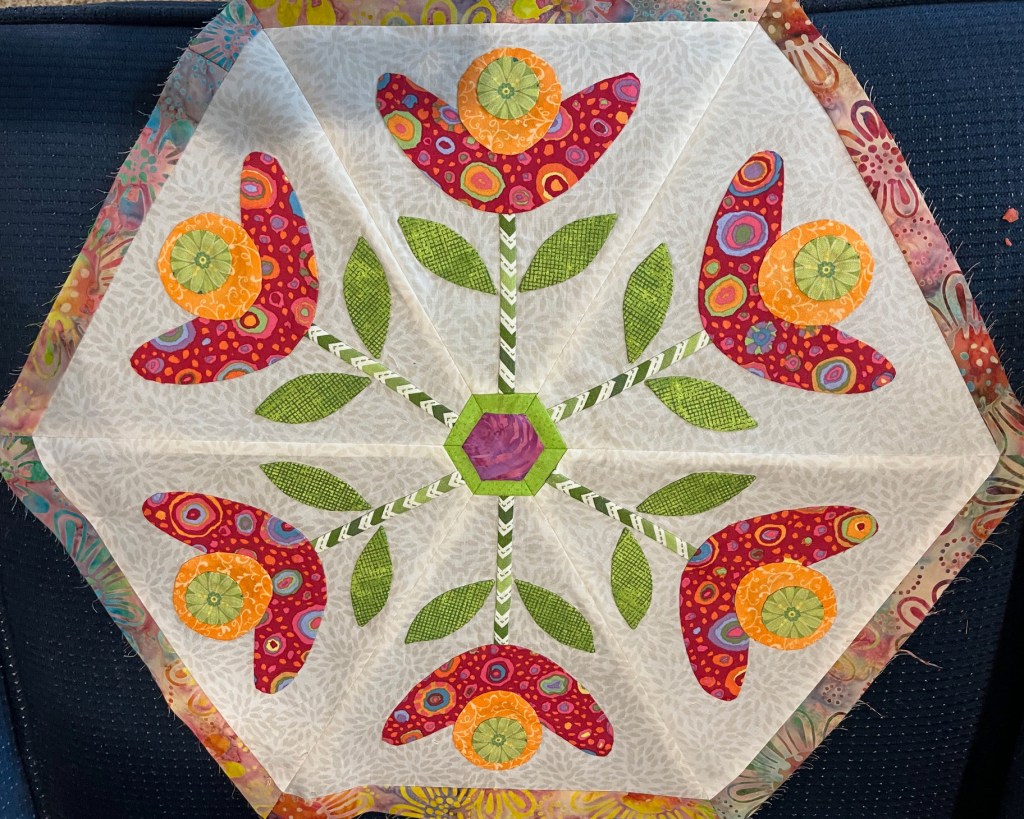
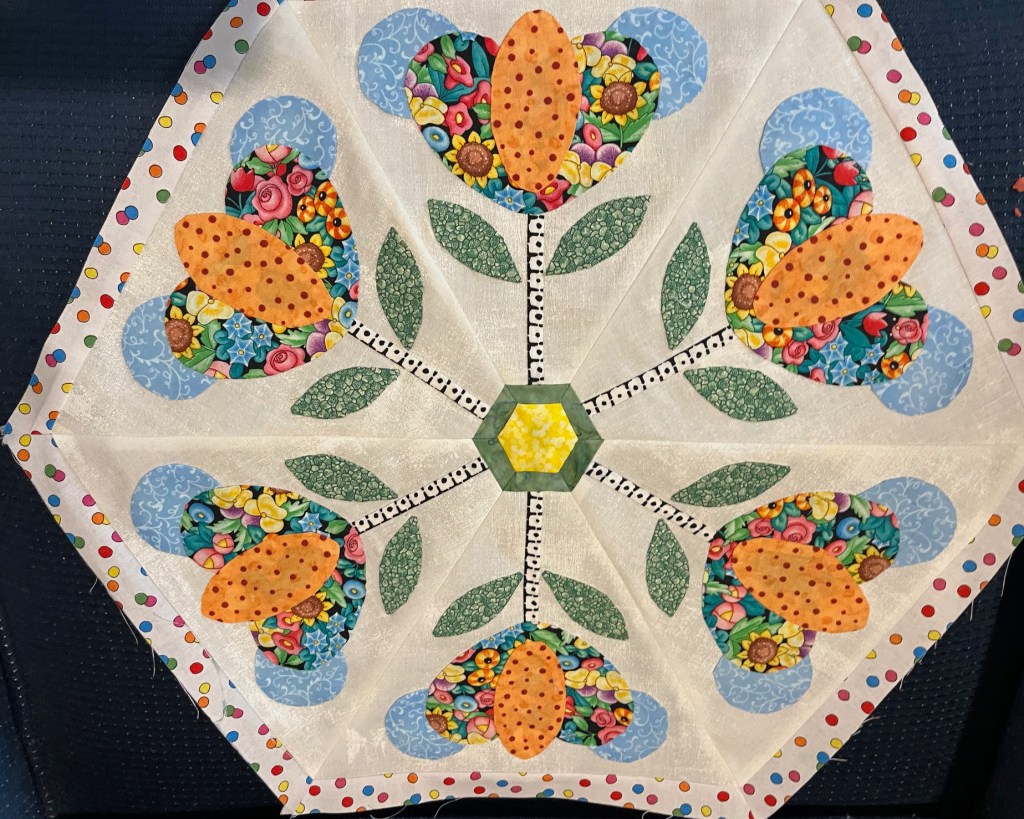
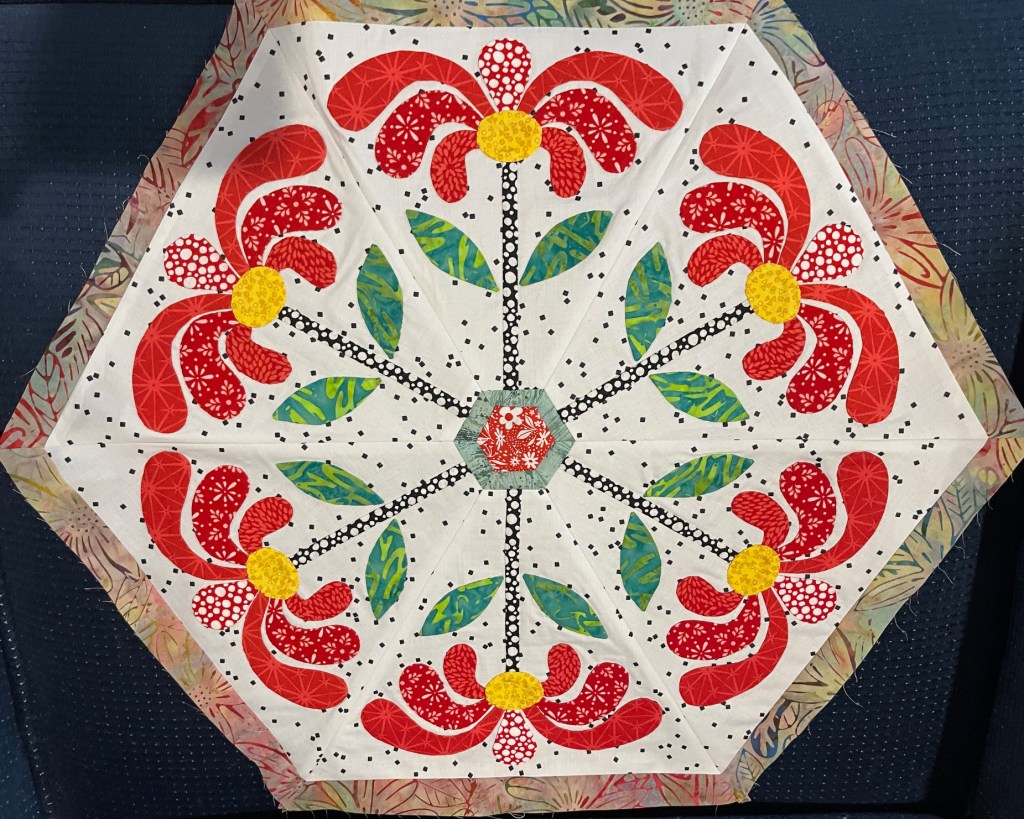
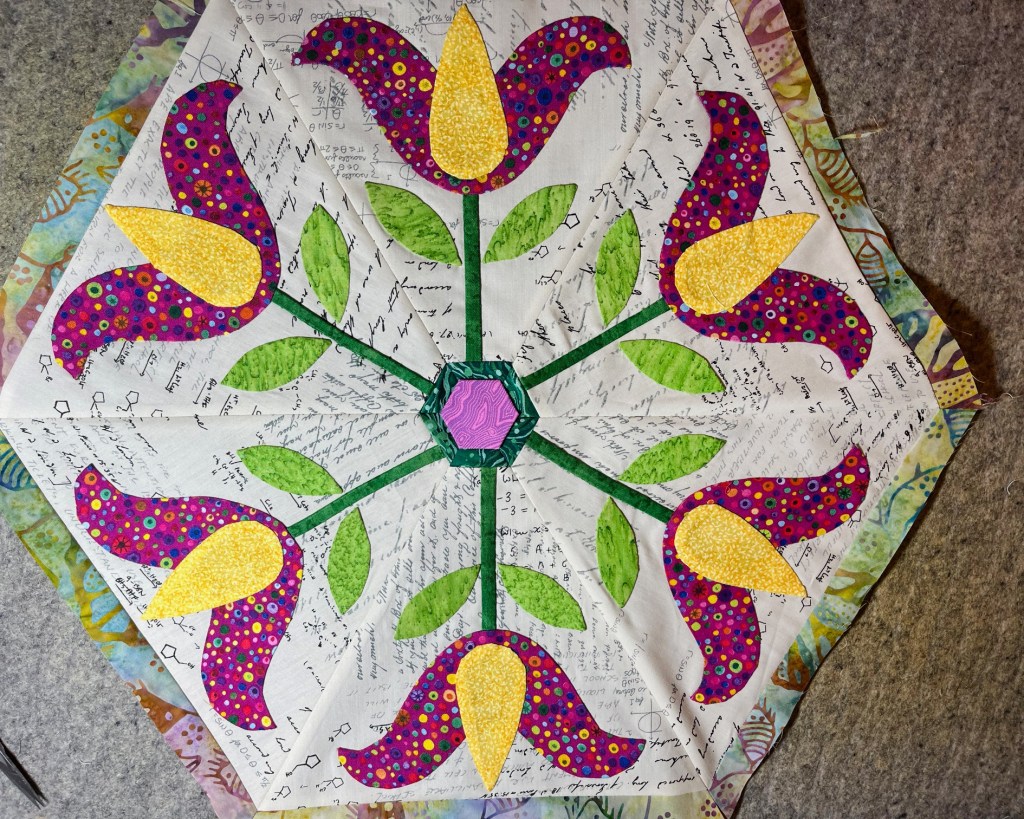
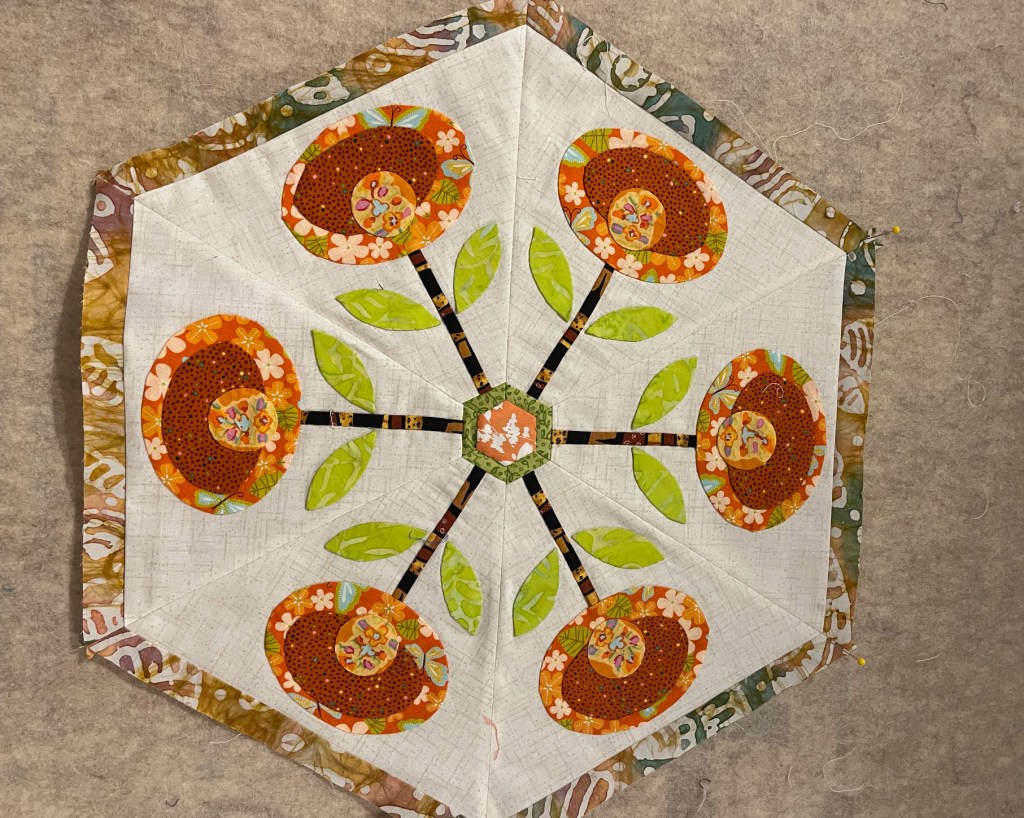
Elizabeth sent us this photo of her finished bright and happy Blooming Joy quilt. I love the white background—so different from the blues I used. These flowers look so fresh you can practically smell their sweet scents and the leaves in the outer triangles add a good frame to the blocks without taking over. Well done, Elizabeth, and thank you for sharing it with us!
Elizabeth named her quilt Posie Pals which is a thing you can do. I have to name the quilts I make but you are welcome to give your quilt a name that is meaningful to you.
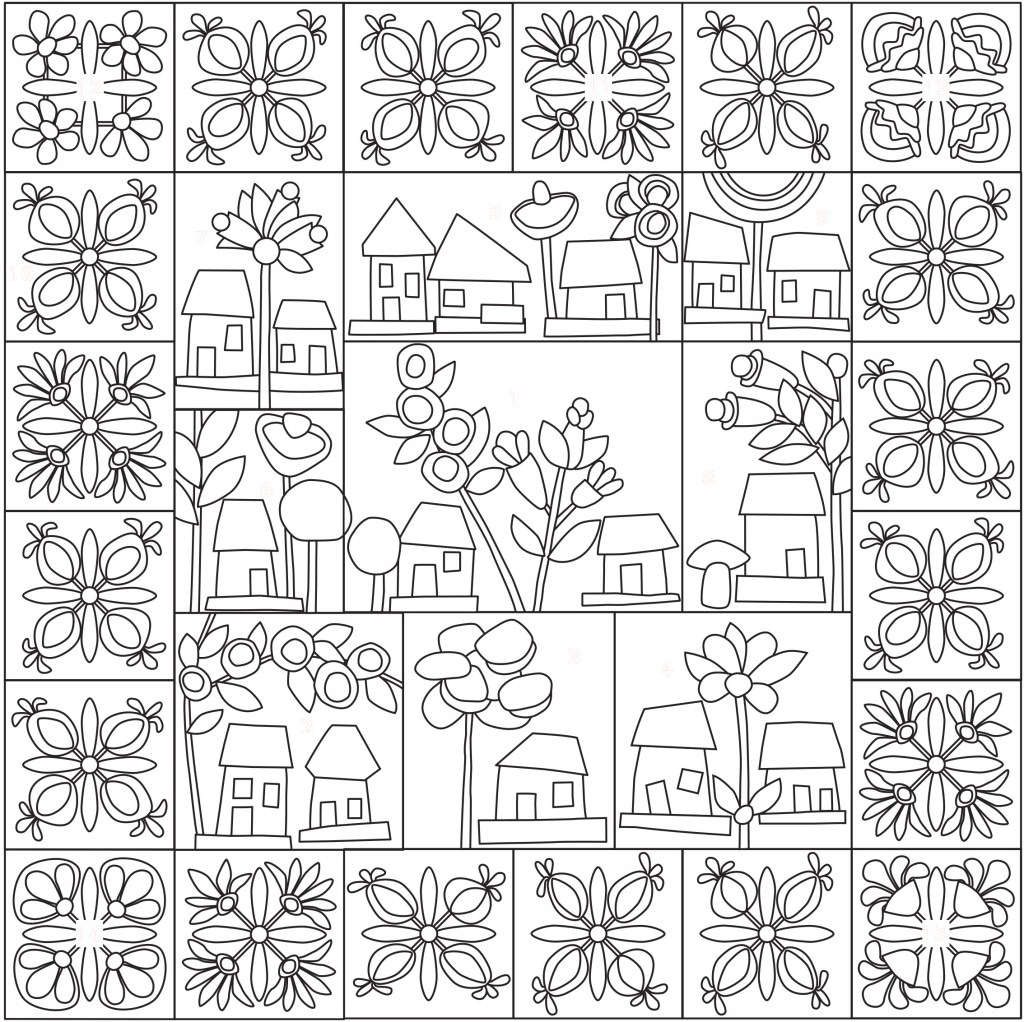
One of the things I love most about Buttonwood Village is that it gives you options. There isn’t just one right way to make this quilt—you get to choose the version that fits your space, your time, and your stitching mood.
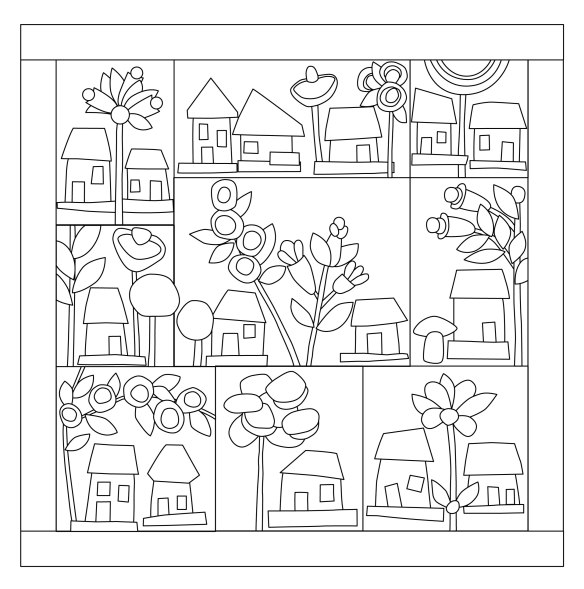
Option 1: The Original Village The original Buttonwood Village features 9 house blocks surrounded by 20 border blocks, finishing at 60˝ x 60˝. This version feels complete and cozy, with the houses nestled right into their own little neighborhood.
Option 2: Houses Only I know some of you prefer a smaller wall quilt. You can make just the 9 house blocks, add a 3˝ border, and end up with a sweet 46˝ x 46˝ quilt. Simple, charming, and absolutely perfect.
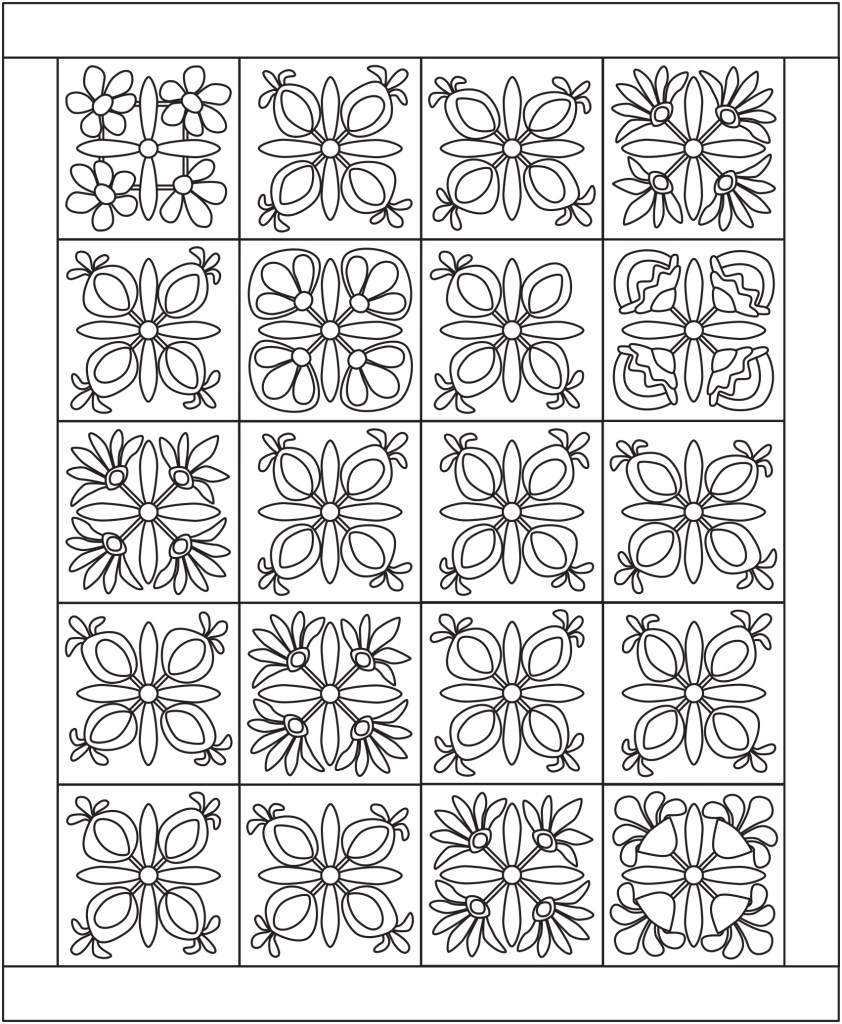
Option 3: Border Blocks on Their Own
The border blocks measure 10˝ x 10˝, and if you make all twenty of them, they can be set together into a more traditional quilt that finishes at 46˝ x 56˝. It’s a great option if you fall in love with the border designs and want to let them shine.
You don’t need to decide right now. Just tuck these possibilities into the back of your mind as the Block of the Month moves forward. One project, three paths—and plenty of room to make it your own. 😊
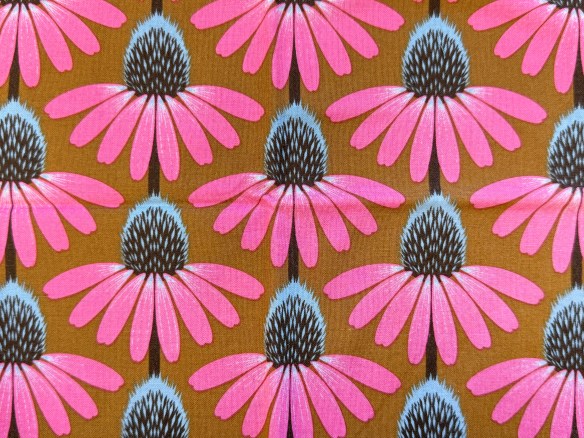
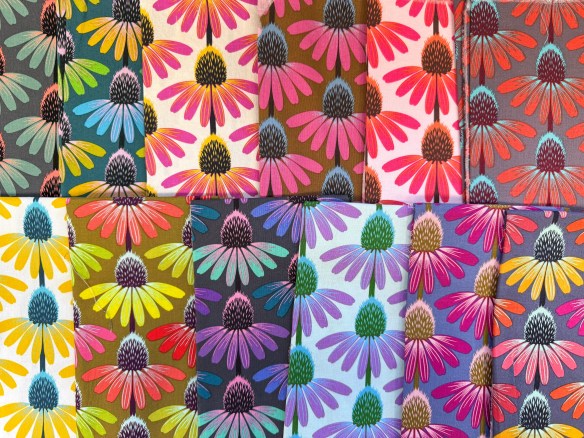
Anna Maria’s Zinnia print first came out years ago and since then it has been reissued in different colors. I love them all! Not sure which one I bought first, but it could have been this one:
Each flower is 3 3/4″ wide by 3″ tall if you count the stem. The spacing is tight in all the right ways. but I do wonder if some people shy away from it because the flowers are larger than your typical “small” print. Personally? I don’t mind one bit. As I said… I LOVE this fabric and have it in every color.
I haven’t pieced with it yet, but I will. I even have a stack of Kaffe stripes that would be perfect with these zinnias—later. When I have time. Right now I’m deep into Buttonwood Village and have already found three perfect places for a flower to sneak in.
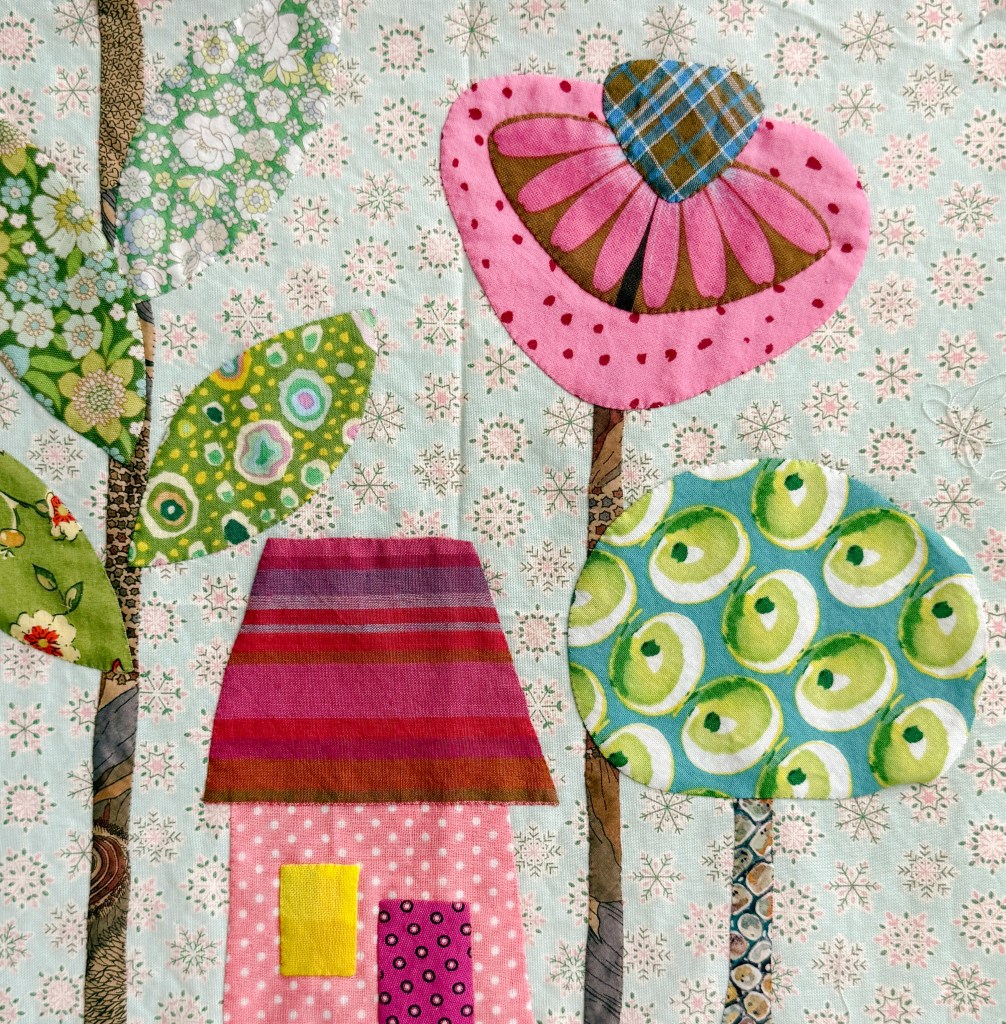
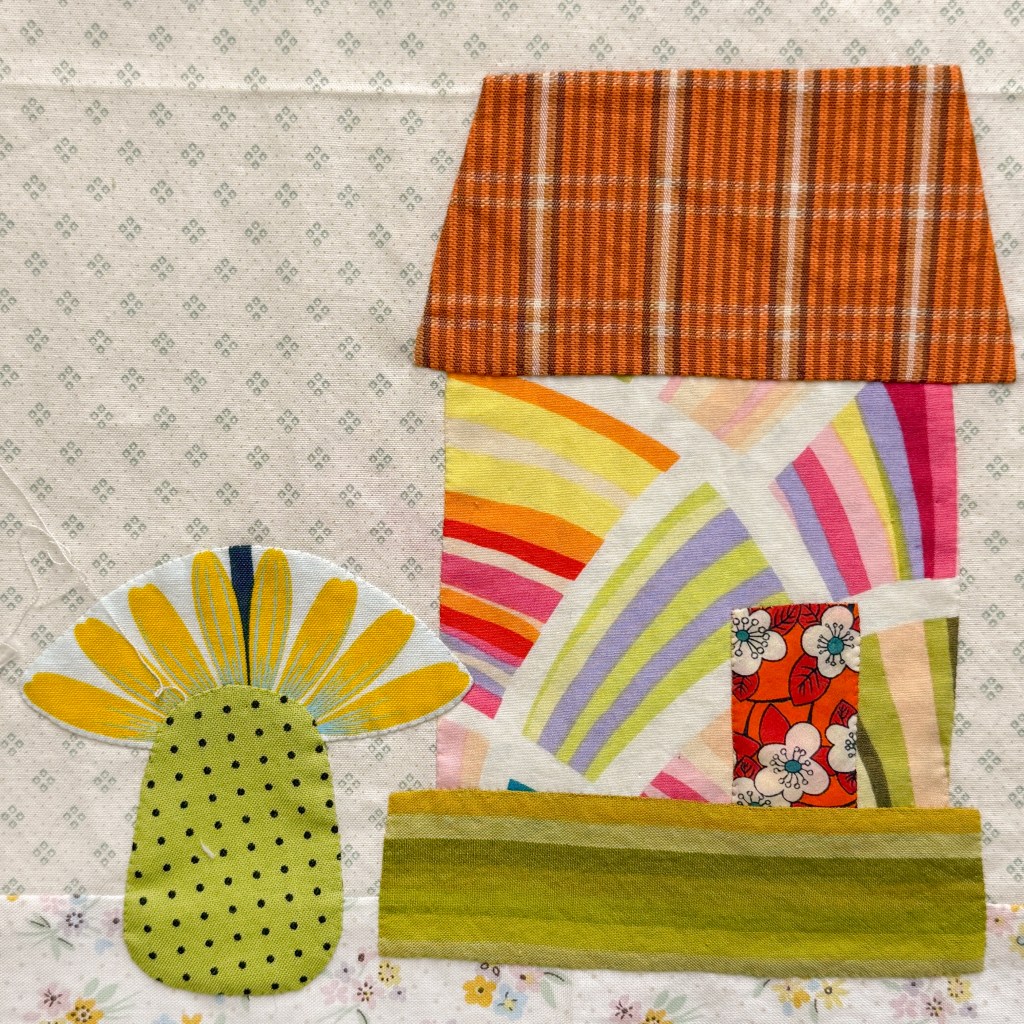
The flower becomes a treeIs that a pineapple bush?The flower is a palm tree!
One flower becomes a tree. Another becomes a pineapple bush? And the third one could be a palm tree!
That’s the thing about bigger prints: if you avoid them, you miss out on so much fun. I encourage you to give them a try—you might be surprised where a big, beautiful print can take you 🌸.