I received this lovely photo on January 24…

Made by Carolyn Janz
Carolyn says that she started this quilt in 1998, finished it that day. She has made a lovely version of the Simply Delicious pattern. Very nicely done, indeed!
I received this lovely photo on January 24…
Made by Carolyn Janz
Carolyn says that she started this quilt in 1998, finished it that day. She has made a lovely version of the Simply Delicious pattern. Very nicely done, indeed!
I have received photos of 3 very different quilts made from Piece O’ Cake patterns recently. I think you all will enjoy seeing them!
The first quilt is Magen’s Flower Garden made by Nadia M., in her own colors. It’s so pretty and I love the way she coordinated the colors between her hex-flowers and the central fabric.

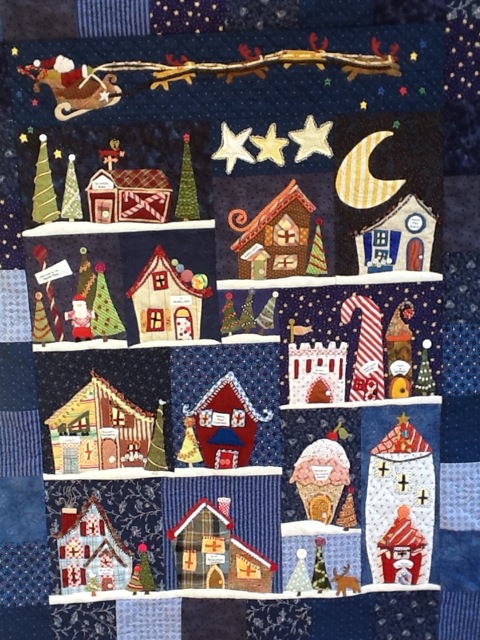
Linda S. wrote to say that she just finished making Welcome To The North Pole for a friend. She says that this quilt was so much fun and she knows the recipient and her friend will enjoy it for years to come. I would add that everyone who sees it will enjoy it!
Mannette A. made the next quilt. It’s not from a Piece O’ Cake pattern but she said:
I’m including a pic of my finished quilt that is my first appliqué project. This quilt is hand pieced, appliquéd, and quilted. I would NEVER have attempted the appliqué if it weren’t for your tutorials and advice (not to mention supplies)
Thank you so very much!
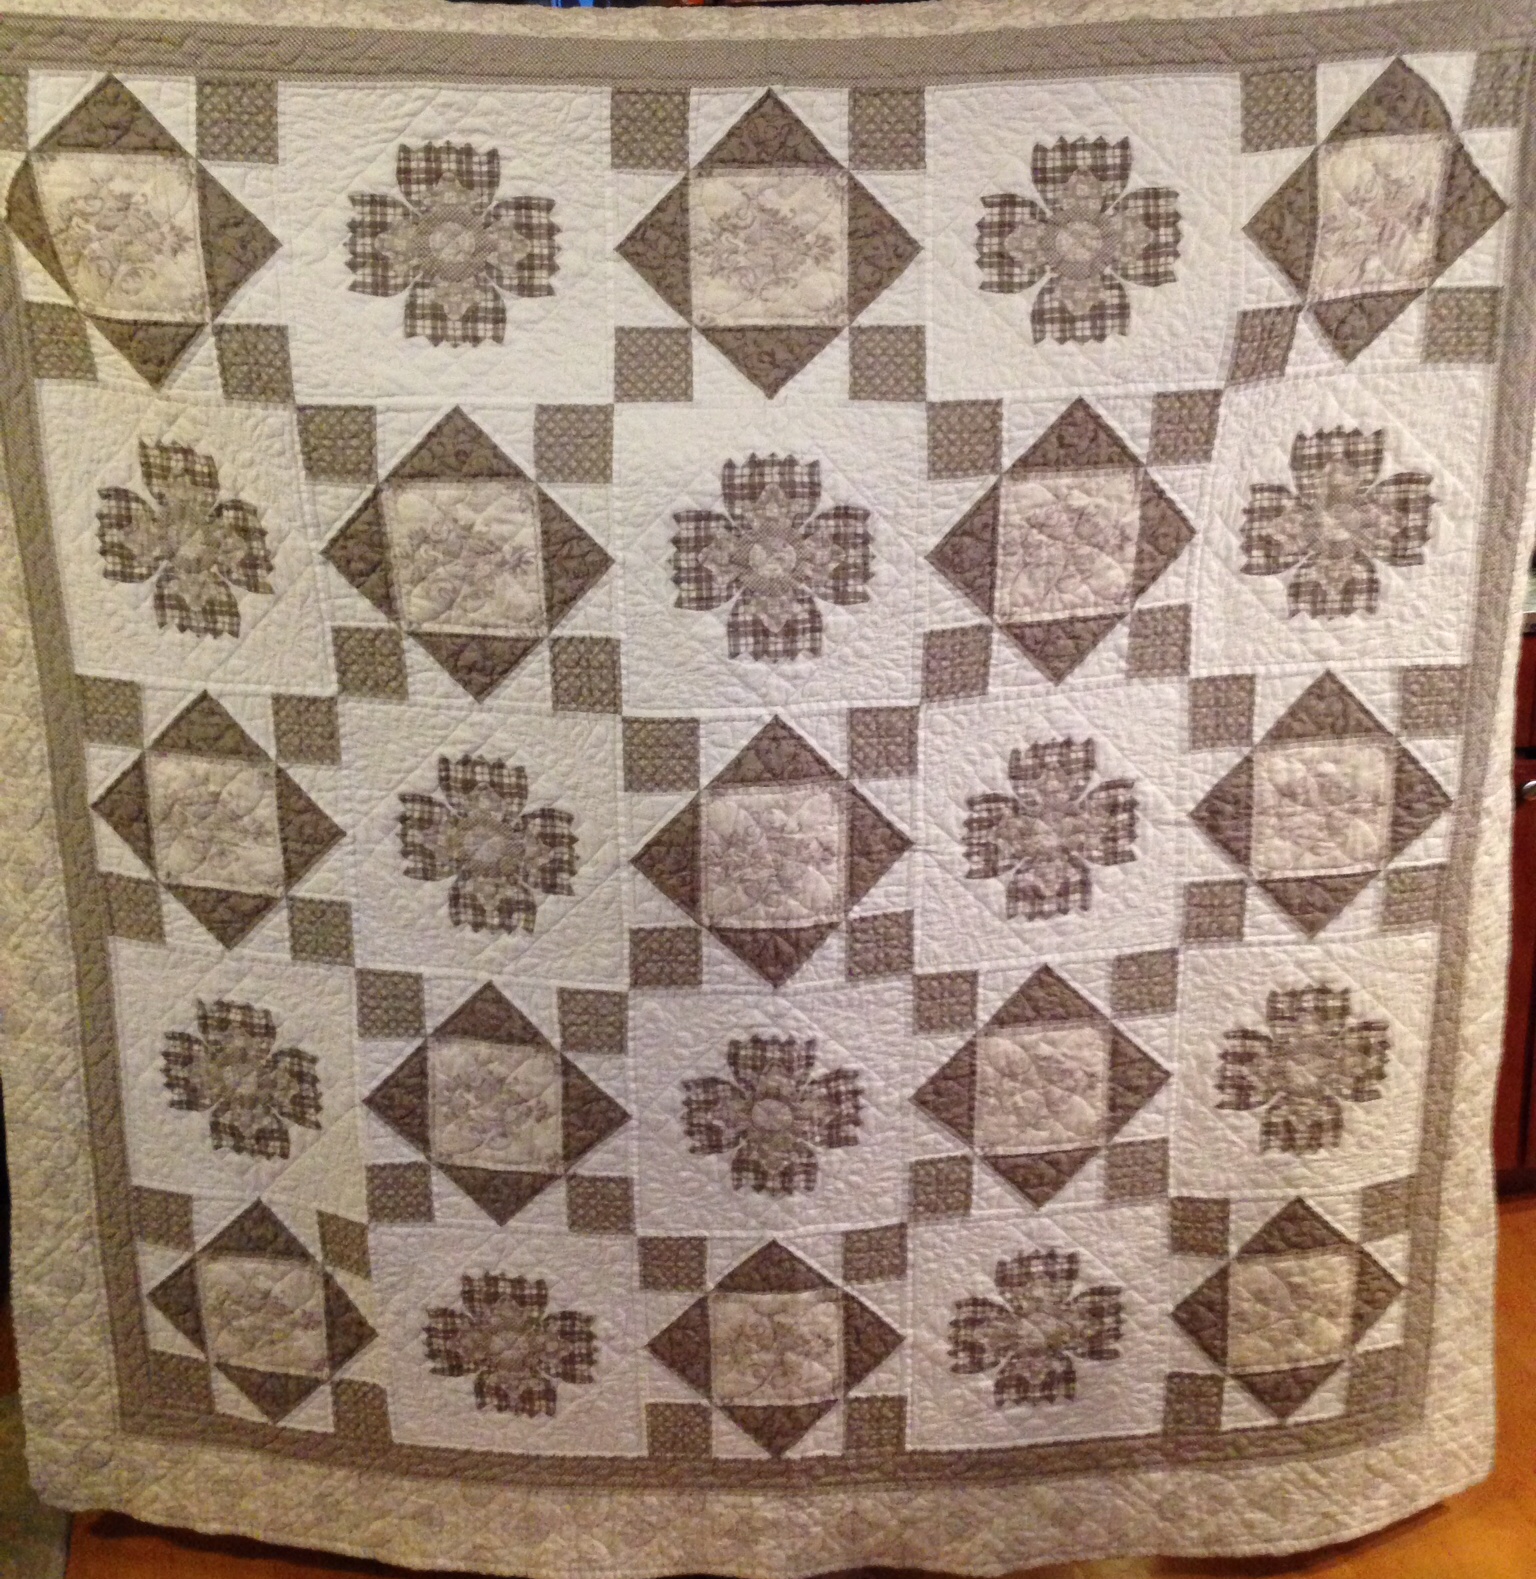
Didn’t she do a great job! And, even though I don’t make them often, I’ve gotta say that I do love to see a quilt made solely from neutrals.
Thank you each for sharing your quilts with us!
I got an email from Rebecca. After I replied I thought you all would enjoy both her email and my reply…
Hi, Becky! I have both of your applique sampler books, have read them through several times, dog eared and highlighted, et cetera. I have also watched your videos. You must be a wonderful teacher in person! I’m working on my first needle turned applique block and all was going well until I got to the small leaves. The block design is my own “Frankenstein” whig rose, combination of several different applique patterns from back issues of Quilter’s Newsletter, and I tried to include as many different shapes and sizes as I could so it would be a good learning piece.
I’m having trouble with the end where the leaf is round in a tight outer curve. I have been trying to finger press carefully along the chalk line, but I end up smearing the chalk and can’t seem to finger press a smooth enough curve exactly on the line—and my leaves are looking a little lumpy where they ought to look smooth. I have tried making my turning allowance narrower and turning only one stitch at a time. Anyway, your other videos have been so helpful. I would love to see a tutorial on how to do a small, tight outer curve. Rebecca
I’m having trouble with the end where the leaf is round in a tight outer curve. I have been trying to finger press carefully along the chalk line, but I end up smearing the chalk and can’t seem to finger press a smooth enough curve exactly on the line—and my leaves are looking a little lumpy where they ought to look smooth. I have tried making my turning allowance narrower and turning only one stitch at a time. Anyway, your other videos have been so helpful. I would love to see a tutorial on how to do a small, tight outer curve.

My reply:
Hi Rebecca:
Your stitching is lovely! Truth be told, you might be too critical of your own work. That said, if it was a circle instead of a leaf, more round would be better.
I wish I could do another video on tight curves and will but it’s going to be a while. I’ve got several weeks of work to do on the next book and barely have time to look up!However, maybe I can help you with words, if not a video.
First, slow down on those curves. What I mean is that this area is not going to turn under particularly quickly.
Where you see the little bumps at the edge, I suspect that the fabric is pleated, or folded over itself, on the underside. When I sew a curve like that, I can feel the pleat with my fabric-holding-fingers as well as see it with my eyes. It is at that point that you should park your needle and use the point of a damp toothpick to reach underneath and smooth open the pleat.
Some pleats take more fooling with than others. That’s why you need to slow down and just work with it until the edge is smooth.
If your curve flattens out, use the point of the toothpick or needle to move it back into round.
Your stitches look pretty small (close together) but this is an area where you want to be sure that there don’t appear to be gaps between your stitches.
I hope this helps, both Rebecca and others who might be having trouble with curves!
Becky
Susan (a blog reader) sent me this photo and I thought you all would enjoy seeing her first applique project!
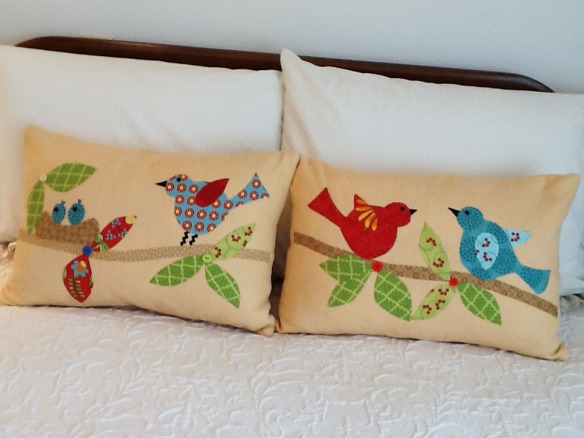
Susan wrote: “I took parts of your blocks (from Applique With Attitude) and arranged them to suit the shapes of my pillows. I began quilting about a year and a half ago and came across your website quite by accident…..a lucky accident for me! I like applique better than any handwork I have ever done. Thank you for inspiring me…..wish I had your eye for color.
Your work is amazingly bright and beautiful and cheerful, and your website is so easy to navigate and packed with helpful information. Your tutorials got me off to a good start for the basics of needle turn applique (I “cheat” and use a toothpick.) [FYI—as I wrote to Susan, toothpicks are a great tool and it’s not cheating to use them. It’s just smart :-).]
The buttons on my pillows came from my grandmother’s button boxes,which were an old snuff can and an old baking powder can. She’s been gone for many years, but she is still with me. 🙂
Thank you for your long-distance help, Susan”
I have to say that I do enjoy getting emails like this. Seriously, who wouldn’t? I’m not saying that to get you all to write to me. No, it’s more of a reminder that we should all, me included, send notes of gratitude. That said, here’s one from me, to you:
Thank you all for taking the time to read what I post. Honestly, it makes my day to know that you all actually do that. I work from home most of the time and our online community is a very nice part of my life. I’ll do my best to not get boring :-).
Have a lovely day…

Gail from Ontario sent me a photo of the little quilt she finished from a block started in my class at the London Friendship Quilter’s Guild in Sept 2013. She added some button flowers and embroidery and hand quilted the block into a little wall hanging. It’s way cute!
I am always happy to see the projects that you all make from our patterns. Happy stitching!


