Simply Delicious…

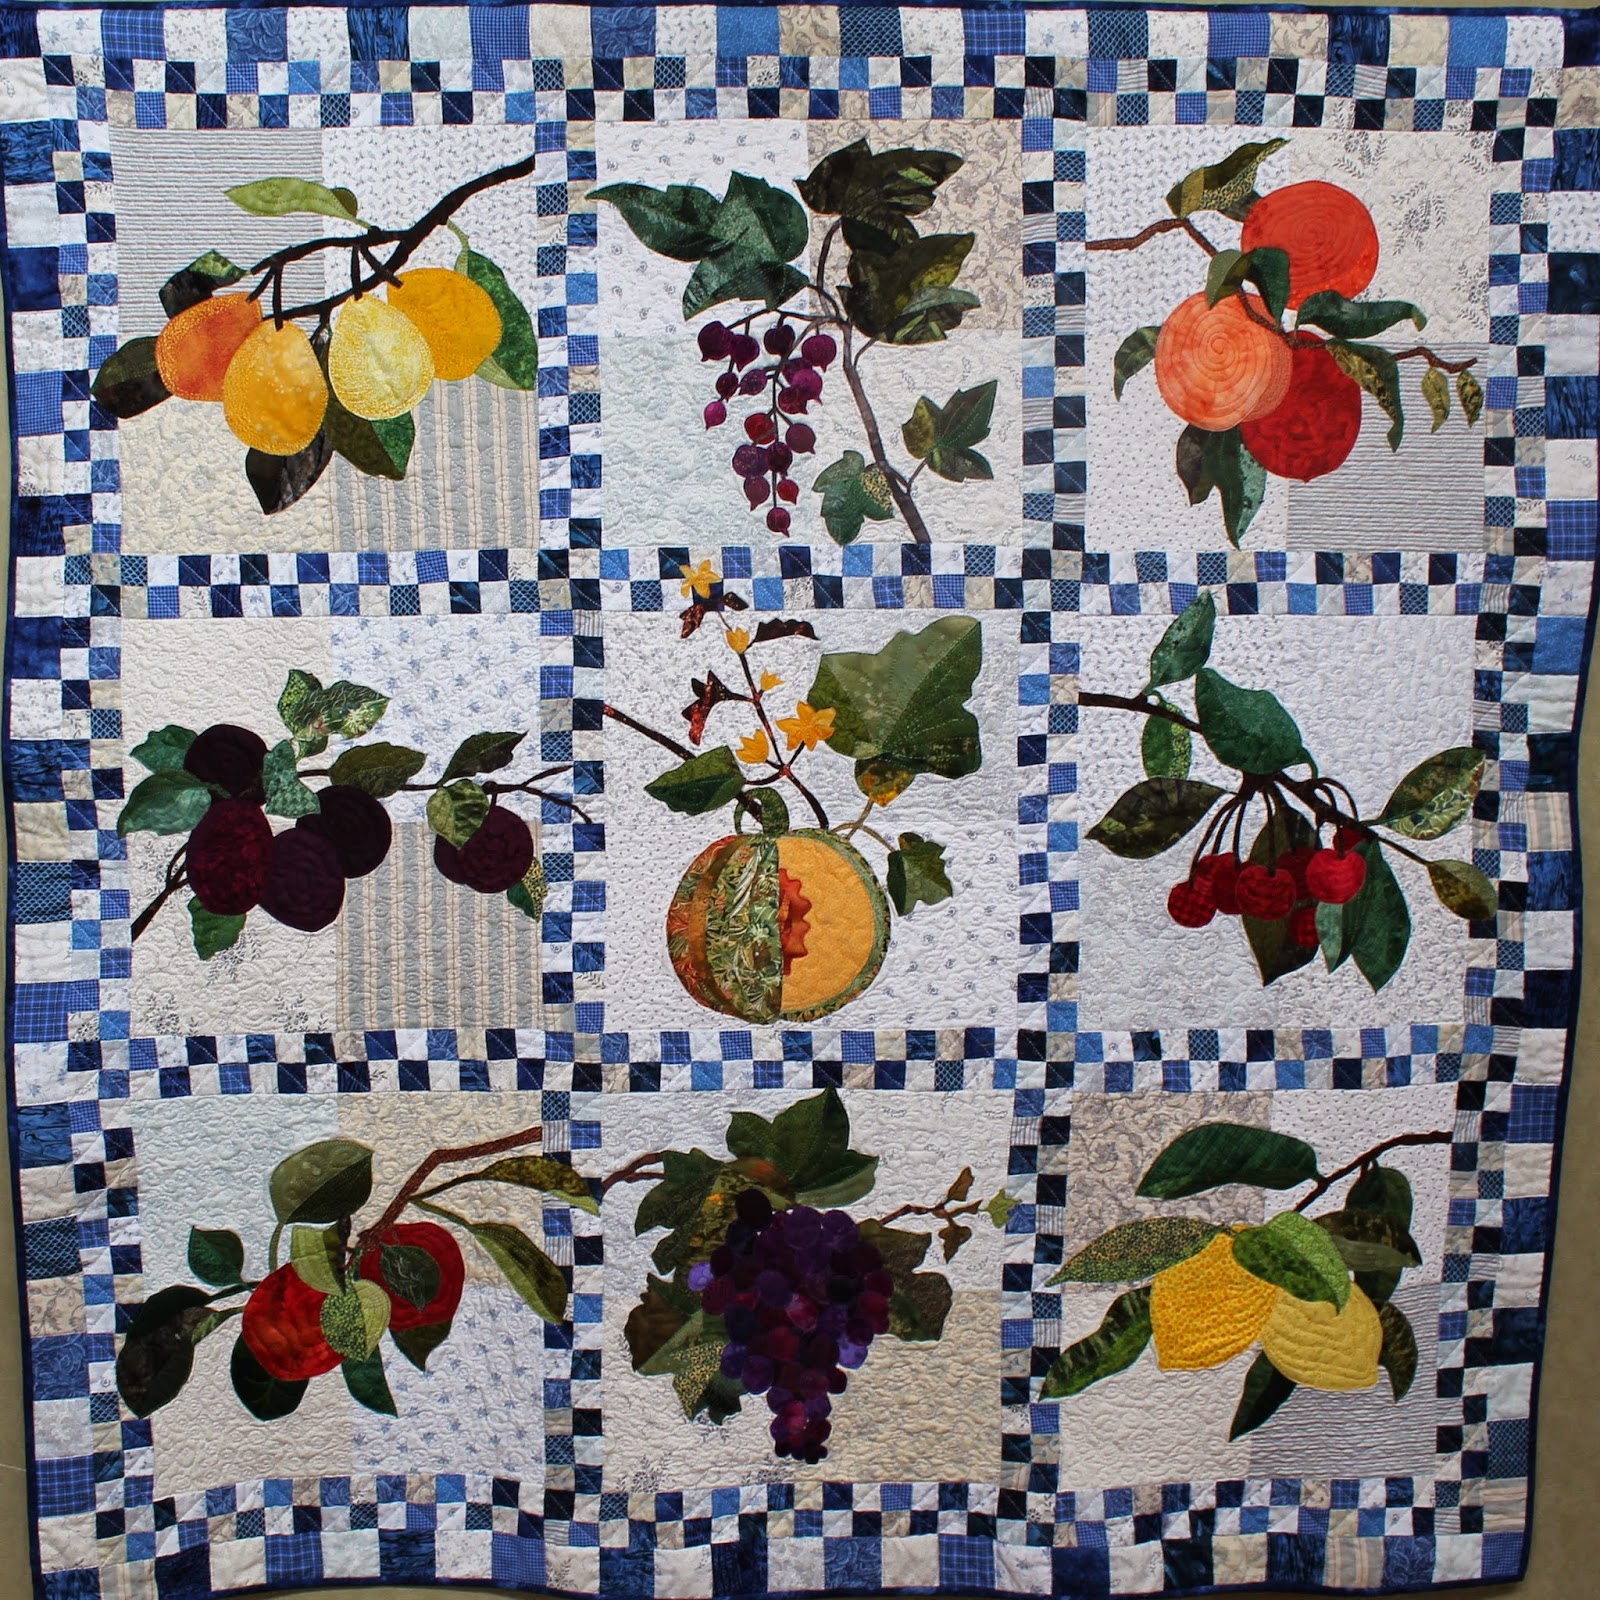
Lynette C. from New Zealand 2007 emailed to say that she has just completed her 9 block version of “Simply Delicious” and she graciously said that I could share it with you! Thank you to Lynette! It is a lovely quilt and you will enjoy seeing the close-ups that she posted on her blog. Click here to this and several more photos on Lynette’s blog.

SDbyLynetteCollis

In other news, I sewed most of last week on a sampler quilt for the Piecing book that just did not turn out well. I chose some colors unwisely and let the prints take over. Really, it ought to look good, but it doesn’t. Linda’s comment was that it looked like a birthday party (possibly with clowns).

I wish I could show it to you but I can’t since I’m still going to use the pattern in the book, but in a different colorway. If there’s room in the book, it will make a lovely example of what not to do.

I don’t mind sharing the fact that I occasionally make a lemon. Even when you know what you’re doing, it is possible to put together a quilt that is just wrong. Rather than losing heart, take a deep breath and move on. Save your lemons and find a way to turn them into lemonade! They can make great charity quilts, or baby quilts—they also make nice quilt backs!

Yet another iron bites the dust…

I’m done with my Rowenta Pro Iron Steam Station (see this post). It works, but the reservoir has an unpredictable leak. When it leaks, it’s more like a flood and that does not mix well with the wood floor below.

Additionally, the Steam Station is slow to heat up (a minor annoyance). Once it is hot, it really puts out the heat. That’s good, except when it’s hot outside which is half the year where I live. When the iron is on, the studio gets uncomfortably warm. And did I mention that this this is big and awkward to store?

I went shopping for a smaller, cheap, reliable iron and got a Black and Decker, model ICR05X. At least it was cheap because it started spitting and leaking water out of the steam holes almost immediately. I am just about disgusted with irons and, if I didn’t have to have one, I would give up.

Luckily, in my last Consumer Reports magazine, there was a short review of irons. Some of the higher-rated irons were light, which they must have considered a plus.

Iron-3

After careful consideration, I bought a Panasonic NI-W950A.

Iron-1


The sole plate is pointed in front and back, which I somehow missed when I was shopping. How I missed that I do not know because the photo is huge on the box.

Iron-2

I’ve been using it for about a week and so far, so good. The pointy back is fine—I neither hate it nor love it. The iron gets hot fast, it steams pretty well. It’s heavy, which I view as a plus. I like the way the base of the cord swivels out of the way. It is stable when ‘standing’—more so than most irons.

It has an auto shut off, which I like, and it heats up quickly when moved. Honestly, if there is a year of good ironing from this iron I will be happy. If it doesn’t last, I’m going to consider a classic iron from the Vermont Country Store.

I still wish I had the space (and was willing to spend what it costs) for a Laura Star ironing system. Sigh.

King size is BIG!

I believe I mentioned that I had made a quilt for the new Piecing book that measures 118″ x 118″. Technically that is king size, but mattresses are tall these days, and I’ve added foam toppers to them. It takes a BIG quilt to cover the edges of the mattress (and the edges of the blanket beneath it).

WowieBack

This is the quilt back. I made it bigger, of course—too big. The quilt will not hit the floor.I used 2 Kaffe Fassett fabrics that look nice in the room and with the periwinkle headboard. I think much of the time, the quilt back will be showing. That way I won’t have to worry about the grandkids and cats when they are on the bed. (The quilt top has lots of white in it.)

I thought about quilting this monster myself (for about 1 minute) and then I contacted Angela Walters who has thankfully agreed to quilt it. Yay, Angela!


Linda’s Quilt Auction

Linda is moving from Grand Junction to Buckeye, AZ, in the next few months to a brand new, slightly smaller house. She needs to downsize her collection of quilts—her loss of space is your quilting gain!

This auction featured 4 different quilts, in a variety of styles. All quilts are in excellent condition. Linda has posted a starting bid for each quilt. The auction has ended, but there is likely to be another :-).

This slideshow requires JavaScript.

Happy bidding!

I got an email from Rebecca. After I replied I thought you all would enjoy both her email and my reply…

Hi, Becky!  I have both of your applique sampler books, have read them through several times, dog eared and highlighted, et cetera. I have also watched your videos.  You must be a wonderful teacher in person!  I’m working on my first needle turned applique block and all was going well until I got to the small leaves.  The block design is my own “Frankenstein” whig rose, combination of several different applique patterns from back issues of Quilter’s Newsletter, and I tried to include as many different shapes and sizes as I could so it would be a good learning piece.

I’m having trouble with the end where the leaf is round in a tight outer curve. I have been trying to finger press carefully along the chalk line, but I end up smearing the chalk and can’t seem to finger press a smooth enough curve exactly on the line—and my leaves are looking a little lumpy where they ought to look smooth. I have tried making my turning allowance narrower and turning only one stitch at a time.  Anyway, your other videos have been so helpful. I would love to see a tutorial on how to do a small, tight outer curve. Rebecca

I’m having trouble with the end where the leaf is round in a tight outer curve. I have been trying to finger press carefully along the chalk line, but I end up smearing the chalk and can’t seem to finger press a smooth enough curve exactly on the line—and my leaves are looking a little lumpy where they ought to look smooth. I have tried making my turning allowance narrower and turning only one stitch at a time.  Anyway, your other videos have been so helpful. I would love to see a tutorial on how to do a small, tight outer curve.

image

My reply:

Hi Rebecca:

Your stitching is lovely! Truth be told, you might be too critical of your own work. That said, if it was a circle instead of a leaf, more round would be better.
I wish I could do another video on tight curves and will but it’s going to be a while. I’ve got several weeks of work to do on the next book and barely have time to look up!

However, maybe I can help you with words, if not a video.

First, slow down on those curves. What I mean is that this area is not going to turn under particularly quickly.

Where you see the little bumps at the edge, I suspect that the fabric is pleated, or folded over itself, on the underside. When I sew a curve like that, I can feel the pleat with my fabric-holding-fingers as well as see it with my eyes. It is at that point that you should park your needle and use the point of a damp toothpick to reach underneath and smooth open the pleat.

Some pleats take more fooling with than others. That’s why you need to slow down and just work with it until the edge is smooth.

If your curve flattens out, use the point of the toothpick or needle to move it back into round.

Your stitches look pretty small (close together) but this is an area where you want to be sure that there don’t appear to be gaps between your stitches.

I hope this helps, both Rebecca and others who might be having trouble with curves!

Becky


AP&Q One Million Pillowcase Sewathon…

American Patchwork & Quilting is going to host their first 24-hour sewathon for the One Million Pillowcase Challenge. This is a cause that has touched more than 560,000 people across the United States!

Click here to see if there is a quilt shop near you where you can go join the fun! If there is not an event near you, you can still help by sewing a pillowcase for a local charity and by posting about the sewathon on your own social media (#APQSewathon).

You can follow along on Facebook during the 24-hour event on September 19-20 to see stories, pictures of events, and to add to the count of the pillowcases donated.