Kauai Road — done!

This quilt began with a photograph of a road in Hanalei, Hawaii. If you’ve been there, you know the place. I used Photoshop to generate a drawing.

I made a placement overlay with the bones of the design. I didn’t use templates — I cut fabric by eye and built the quilt on my design wall.

Here it is, unquilted…

KauaiRoad-15

The quilting brings all the elements together; the quilting finishes the quilt.

I love this quilt, but Steve loves it more. It is hanging in our dining room on the wall he can see from his spot on the sofa. I suspect it’s going to stay on that wall for a long time.

KauaiRoad-Final-01-1000

Kauai Road, update…

In between life’s busy-ness, I squeezed in some sewing time on my Kauai Road quilt. Steve says that it looks just like the place which makes me very happy.

KauaiRoad-15

I am sewing the power lines now. The fence posts (that will be in the lower left) are still to come, and maybe some dark windows on the little house.

I leave for Quilt Market in Houston tomorrow. I don’t have time to stay for Festival, but that’s OK because I hope to fire up my BERNINA Q20 when I get home!

Kauai Road, off the wall…

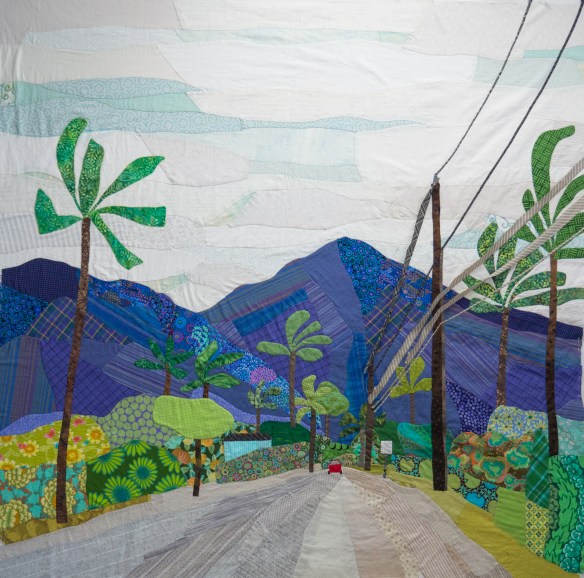
Here it is, with the fabric cut and the overlay in place. The power lines are an important part of the design that will be added nearly at the end of the stitching.

KauaiRoad-09

I’m going to sew all the shapes together by hand, mostly in an applique-ish sort of say. I took off all of the shapes that sit on top of the ‘background’.

KauaiRoad-10

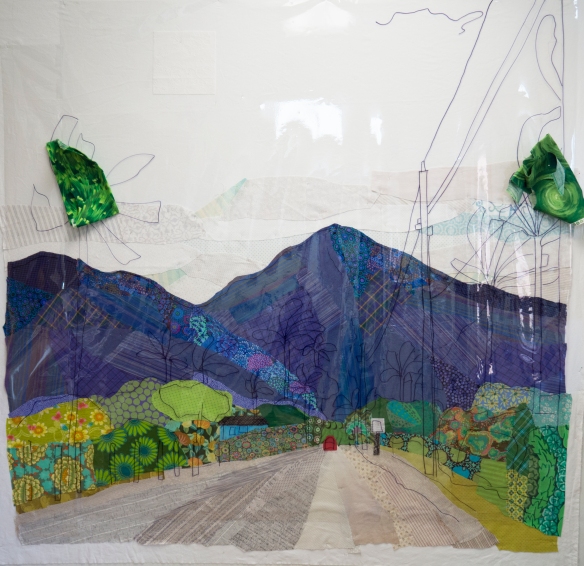
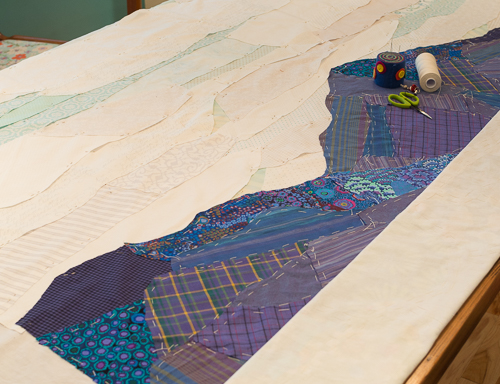
Next, I took it off of my design wall and almost had a disaster. Each shape had multiple pins sticking directly into the wall. I held the bottom of the muslin base layer and slowly pulled the whole thing off the wall. I’ve done this before and the pins held everything in place. This time, some pieces fell off or shifted. It happened so fast I couldn’t even swear at it :-).

I managed to get it on my dining room table, with all of the pieces back where I think they went. That took a little while. Next time I’ll pin much more securely before I take it off the wall.

KauaiRoad-14

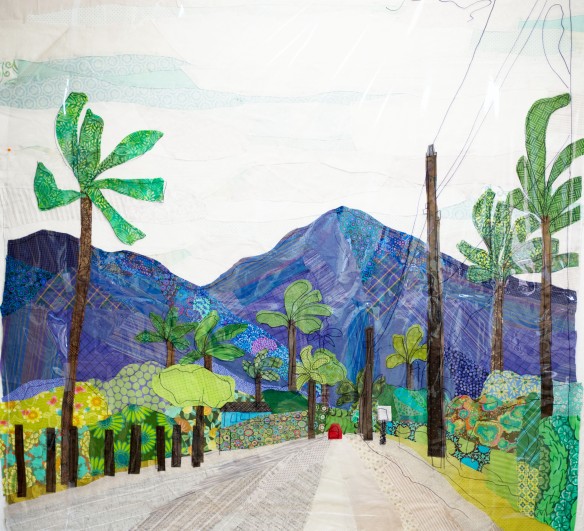
You might be wondering why I didn’t just glue the shapes in place. I don’t like glue, that’s why. I may change my mind at some point but for now, no glue for me.

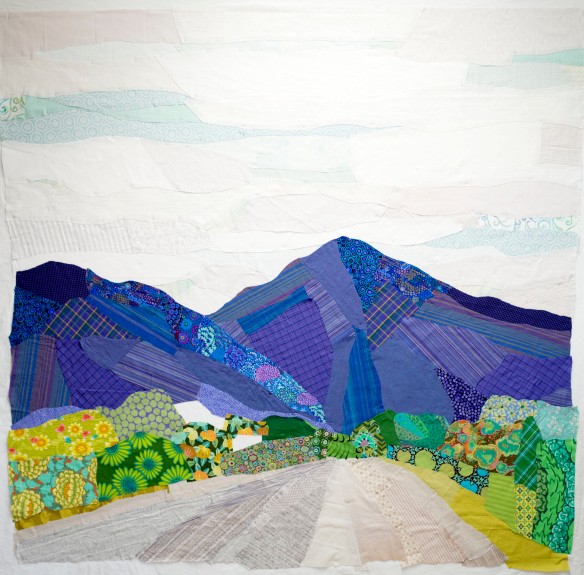
Basting took a while but that’s OK. This project is not about speed, it’s more of a journey.

KauaiRoad-12

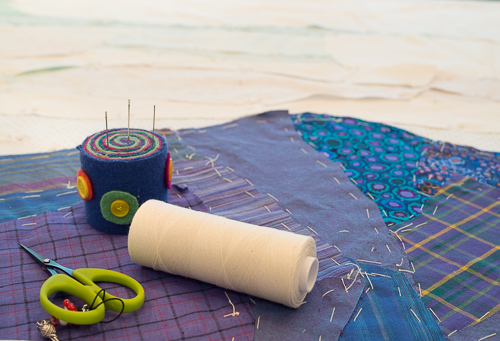
Hand sewing this is going to take a while. I’ll post updates as it comes along.

Kauai Road…

Having the line drawing of the palm trees and telephone poles helps a lot. All through this process, I could see how they would fill up the foreground. The sky, mountains, and bushes on the sides of the road are really background.

Once the mountains were in place, I went back to the road and began cutting fabric for the bushes and trees, but it was slow going. I then turned my attention to the sky, which is mostly cloudy. (It is, in fact, very often cloudy in this spot on Kauai.)

Kauai Road 5

Finding the right fabrics for the sky was hard!!!—so I went back to the greenery :-).

Kauai Road 6

There is a car in my photo, but it’s isn’t red. It needs to be red!

OLYMPUS DIGITAL CAMERA

After getting a lot of the foreground trees and poles cut, I went back to the sky. It was still hard, but I stuck with it. I did have to go buy some fat quarters which was a surprise. It’s getting closer to being ready to take off the wall!


Kauai Road, continued…

Kauai Road

Working with only a rough sketch and no pattern shapes is very different for me. In my applique life, I have drawn patterns that many of you have sewn. The pieces are specific, and numbered. You trace around the templates to make a shape that fits the pattern.

I have also worked in the manner of Ruth McDowell, where I started with a photo and generated a pattern on freezer paper. In this kind of quilt, you may hunt for the right fabric for a shape, but you have a pattern for that shape.

CoffeeCup

As I work on Kauai Road, I’m thinking about so many things at once: What color do I need? What fabric do I have? What size or shape should each piece be? And on and on…A person can only make so many decisions before her brain has had enough. Even though this is fun, it’s a challenge. So why am I working this way?

I want to construct Kauai Road more in the manner of Edrica Huws. I have mentioned her work before, on this blog post. There’s not much documentation on her sewing methods, but in looking at her work I surmised that she was not strictly bound by a drawing, and that she cut shapes more or less intuitively, by hand, with scissors.

OLYMPUS DIGITAL CAMERA

I am learning new things as I work this way, and it’s invigorating!

Figuring it out…

When designing a quilt from a photo, you have to figure out where to start. I opened my photo in Photoshop and cropped in to focus attention on the part of the photo that I liked best.

KauaiRoad-01-Cropped

I usually work in Adobe Illustrator where I can make layers and trace over a photo to make a pattern. But there’s a cool filter in Photoshop called Find Edges. I used it to generate this almost-drawing:

KauaiRoad-01-Edges

I am not going to fuse or glue this quilt. The pieces will be pinned, then basted on a light fabric base. I projected the image onto a 60″ x 60″ piece of thin, prewashed, white muslin on my design wall. I used a soft pencil to draw a stylized version of the image onto the fabric.

I decided to work loosely, cutting fabric to fill in the different areas without making templates or pattern pieces. It didn’t take long for me to realize that the drawing needed to be on an overlay so that I could still see it as I added fabric to the wall. I cut a great big piece of upholstery vinyl, pinned it over the muslin, and traced the lines with a regular Sharpie marker—the kind that comes to a blunt point.

OLYMPUS DIGITAL CAMERA

I’m not aiming for photo realism here. Instead, I’m working in a looser, slightly more impressionistic fashion. It is both scary and fun!