Looking ahead to the 2025 BOM

My quilts begin with an idea, then sketches. What you see below is the final sketch before I moved it to the computer.

This new quilt is going on my bed. Steve’s Birds, the current 2024 BOM, is for Steve’s bed. (Yes, we sleep in different rooms because—snoring 🤣. In our case, a good night’s sleep leads to a very happy marriage.)

The new BOM patterns will be available on their own, in January 2025. The downloadable patterns will not come with fabric—you can use any fabric that suits you. However, I am doing my best to make it easy for you to color your quilt like mine, if you want to.

I am using medium blue backgrounds cut from a variety of Laundry Basket fabrics. This is what I have so far, there may be more. We will offer a kit with similar background fabrics, in a few months, for those who want it.

I am going to use many Liberty of London quilting weight cotton prints in my applique. The prints are iconic, the colors make me smile. I have started gathering fat quarters, but it takes time. You have to get the fabric when it is available and it sells out fast. Some fabric that we have on order won’t be released until next year. Patience is a hard virtue 🤣.
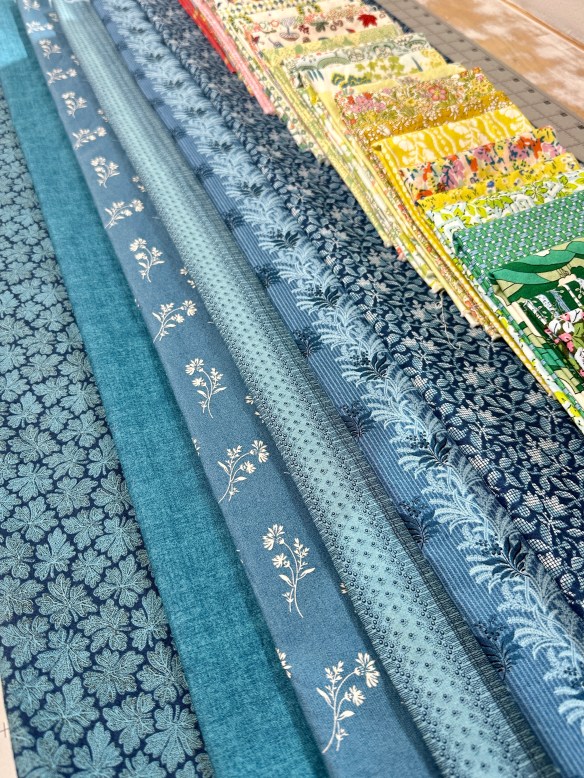
Knowing that some of you will also want to start building a palette of fabric, we are offering a Liberty Stash Building Club that will start soon. If you are interested, please get on the Waiting List. There are a limited number of slots and being on the Waiting List does not guarantee a spot—but you will get an email when it’s time to really sign up.

You don’t have to save this fabric for the 2025 BOM—you can use it for other projects. In fact, you will have Liberty left over after the BOM to use in other projects.

I need to start my quilt soon and will probably have to supplement with other fabric from my stash. Happily, Liberty plays well with other fabrics ☺️.

My color class…

After The Quilter’s Practical Guide To Color was published, people asked me to teach a class on color. I’ve been teaching this class for about a year and, judging from student responses, it is one of my very best classes.

This is a no-sew class. Students come with 4″ squares of white paper and 4″ squares of fabric in a variety of colors and values. I begin with a mini-version of my color lecture and then show how I organize fabric for a project. Students organize their own fabric squares and then the fun begins!

I choose a block from  The New Quick & Easy Block Tool and a color combo and everyone quickly mocks up 4 blocks. ‘Quickly’ is key. Thinking too much about color choices can stop a project from ever happening and it’s important to learn to trust your instincts.

Once glued, we put the blocks together on a table. They are flat and it’s hard to see a pattern, so I use my phone to take a photo. It’s always fun to hear the gasp as everyone sees the pattern emerge on the screen.

These photos are from a color class taught at Happiness Is… Quilting in McKinney, TX.

IMG_9726

Grandmother’s Choice Block

Everyone is working from the fabric they brought and it’s a stretch to imagine using them together in a quilt, but it is surprising how well the blocks come together.

We change the layout and take more photos:

Each individual knows what they like and what they don’t. We talk about why some colors/values/settings work better than others. My goal is to empower each student, to make color their friend and ally.

Here is the Homeward Bound block in complimentary reds and greens:

This slideshow requires JavaScript.

It’s fun to put different blocks together, just to see what happens.


This was a 6-hour class, so there was time to mock up several blocks. As the day went on, everyone loosened up and color decisions come quicker and with more confidence.

This slideshow requires JavaScript.

I love this class because quilters who begin the day nervous, leave knowing that color is their friend. Trust me when I tell you that color is your friend too!

PS: If you are a shop or guild and would like to have me come teach, email me. I’m usually booking about 2 years out.


Kauai Road — done!

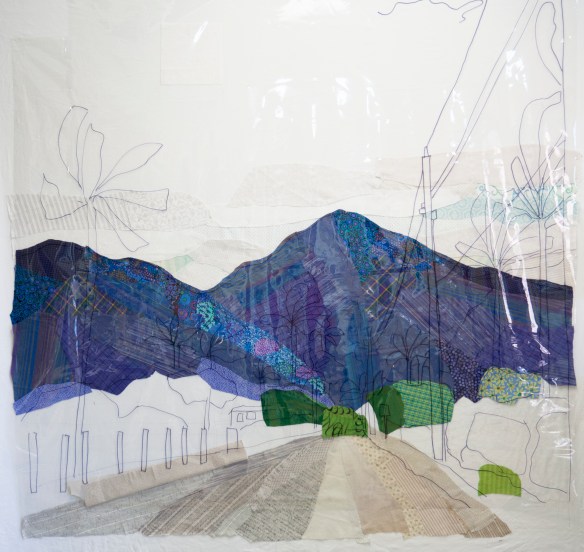
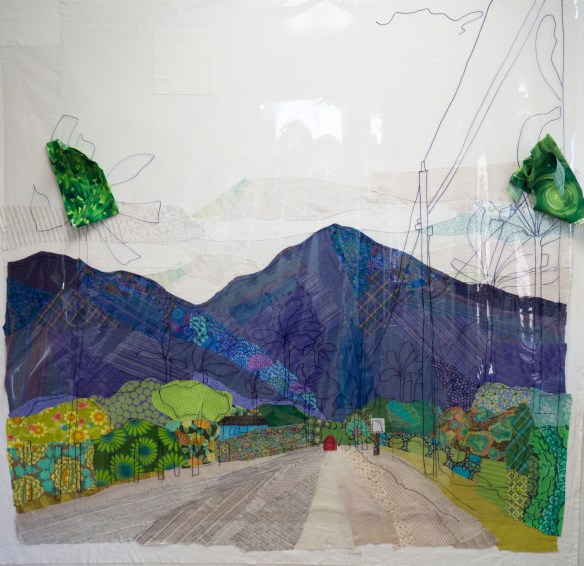
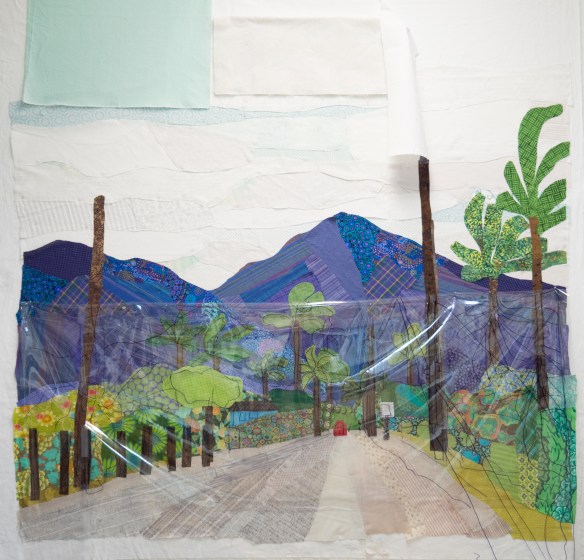
This quilt began with a photograph of a road in Hanalei, Hawaii. If you’ve been there, you know the place. I used Photoshop to generate a drawing.

I made a placement overlay with the bones of the design. I didn’t use templates — I cut fabric by eye and built the quilt on my design wall.

Here it is, unquilted…

KauaiRoad-15

The quilting brings all the elements together; the quilting finishes the quilt.

I love this quilt, but Steve loves it more. It is hanging in our dining room on the wall he can see from his spot on the sofa. I suspect it’s going to stay on that wall for a long time.

KauaiRoad-Final-01-1000

Kauai Road, off the wall…

Here it is, with the fabric cut and the overlay in place. The power lines are an important part of the design that will be added nearly at the end of the stitching.

KauaiRoad-09

I’m going to sew all the shapes together by hand, mostly in an applique-ish sort of say. I took off all of the shapes that sit on top of the ‘background’.

KauaiRoad-10

Next, I took it off of my design wall and almost had a disaster. Each shape had multiple pins sticking directly into the wall. I held the bottom of the muslin base layer and slowly pulled the whole thing off the wall. I’ve done this before and the pins held everything in place. This time, some pieces fell off or shifted. It happened so fast I couldn’t even swear at it :-).

I managed to get it on my dining room table, with all of the pieces back where I think they went. That took a little while. Next time I’ll pin much more securely before I take it off the wall.

KauaiRoad-14

You might be wondering why I didn’t just glue the shapes in place. I don’t like glue, that’s why. I may change my mind at some point but for now, no glue for me.

Basting took a while but that’s OK. This project is not about speed, it’s more of a journey.

KauaiRoad-12

Hand sewing this is going to take a while. I’ll post updates as it comes along.

Kauai Road…

Having the line drawing of the palm trees and telephone poles helps a lot. All through this process, I could see how they would fill up the foreground. The sky, mountains, and bushes on the sides of the road are really background.

Once the mountains were in place, I went back to the road and began cutting fabric for the bushes and trees, but it was slow going. I then turned my attention to the sky, which is mostly cloudy. (It is, in fact, very often cloudy in this spot on Kauai.)

Kauai Road 5

Finding the right fabrics for the sky was hard!!!—so I went back to the greenery :-).

Kauai Road 6

There is a car in my photo, but it’s isn’t red. It needs to be red!

OLYMPUS DIGITAL CAMERA

After getting a lot of the foreground trees and poles cut, I went back to the sky. It was still hard, but I stuck with it. I did have to go buy some fat quarters which was a surprise. It’s getting closer to being ready to take off the wall!


Kauai Road, continued…

Kauai Road

Working with only a rough sketch and no pattern shapes is very different for me. In my applique life, I have drawn patterns that many of you have sewn. The pieces are specific, and numbered. You trace around the templates to make a shape that fits the pattern.

I have also worked in the manner of Ruth McDowell, where I started with a photo and generated a pattern on freezer paper. In this kind of quilt, you may hunt for the right fabric for a shape, but you have a pattern for that shape.

CoffeeCup

As I work on Kauai Road, I’m thinking about so many things at once: What color do I need? What fabric do I have? What size or shape should each piece be? And on and on…A person can only make so many decisions before her brain has had enough. Even though this is fun, it’s a challenge. So why am I working this way?

I want to construct Kauai Road more in the manner of Edrica Huws. I have mentioned her work before, on this blog post. There’s not much documentation on her sewing methods, but in looking at her work I surmised that she was not strictly bound by a drawing, and that she cut shapes more or less intuitively, by hand, with scissors.

OLYMPUS DIGITAL CAMERA

I am learning new things as I work this way, and it’s invigorating!